Deploying a node means spinning it up in one of the supported runtimes. The primary choice is between a containerized with Docker or a native deployment with our static binary that runs on amd64 and arm64 architectures.
Docker
Section titled “Docker”We recommend using Docker to deploy a Tenzir node, as it’s the easiest way to get started.
After provisioning a node, proceed as follows:
-
Select the Docker tab and click the download button to obtain the
docker-compose.NODE.yamlconfiguration file, whereNODEis the name you entered for your node. -
Run
Terminal window docker compose -f docker-compose.NODE.yaml up --detach
Edit the Docker Compose file and change environment variables to adjust your configuration.
Stop a node
Section titled “Stop a node”Stop a node via the down command:
docker compose -f docker-compose.NODE.yaml downStop a node and delete its persistent state by adding --volumes:
docker compose -f docker-compose.NODE.yaml down --volumesUpdate a node
Section titled “Update a node”Run the following commands to update a Docker Compose deployment with a
configuration file docker-compose.NODE.yaml:
docker compose -f docker-compose.NODE.yaml pulldocker compose -f docker-compose.NODE.yaml downdocker compose -f docker-compose.NODE.yaml up --detachNote that we pull first so that the subsequent downtime between down and
up is minimal.
Verify container image signatures
Section titled “Verify container image signatures”Tenzir signs all container images to ensure authenticity and integrity. You can verify signatures using Cosign or configure Podman for automatic verification.
Cosign
Section titled “Cosign”Use Cosign with keyless OIDC verification to validate the image was built by Tenzir’s GitHub Actions:
cosign verify \ --certificate-identity-regexp="https://github.com/tenzir/tenzir/.github/workflows/.*" \ --certificate-oidc-issuer="https://token.actions.githubusercontent.com" \ ghcr.io/tenzir/tenzir:latestPodman
Section titled “Podman”Configure Podman for automatic signature verification using the public key from the tenzir/tenzir repository.
Create /etc/containers/registries.d/tenzir.yaml:
docker: ghcr.io/tenzir: use-sigstore-attachments: trueAdd the following to the docker key under transports in
/etc/containers/policy.json:
"ghcr.io/tenzir": [ { "type": "sigstoreSigned", "keyPath": "/etc/pki/containers/container-signing.pub" }]Copy the public key to the configured path. Podman then verifies signatures automatically when pulling Tenzir images.
For native Linux deployments, first install
Tenzir to get the tenzir-node binary.
Deploy with the curl installer
Section titled “Deploy with the curl installer”The curl installer both installs Tenzir and starts a node as a systemd service:
-
Provision the node and download its config.
-
Create a directory for the platform configuration.
Terminal window mkdir -p /opt/tenzir/etc/tenzir/plugin -
Move the downloaded
platform.yamlconfiguration file to the directory so that the node can find it during startup:Terminal window mv platform.yaml /opt/tenzir/etc/tenzir/plugin -
Run the installer and follow the instructions to download and start the node:
Terminal window curl https://get.tenzir.app | sh
The installer script asks for confirmation before performing the installation. See the configuration documentation for details on how the node loads config files at startup.
Start a node manually
Section titled “Start a node manually”The installer script uses the package manager of your Linux distribution to install the Tenzir package. This typically also creates a systemd unit and starts the node automatically.
For testing, development, our troubleshooting, run the tenzir-node executable
to start a node manually:
tenzir-node _____ _____ _ _ ________ ____ |_ _| ____| \ | |__ /_ _| _ \ | | | _| | \| | / / | || |_) | | | | |___| |\ |/ /_ | || _ < |_| |_____|_| \_/____|___|_| \_\
v4.0.0-rc6-0-gf193b51f1fVisit https://app.tenzir.com to get started.
[16:50:26.741] node listens for node-to-node connections on tcp://127.0.0.1:5158[16:50:26.982] node connected to platform via wss://ws.tenzir.app:443/productionStop a node
Section titled “Stop a node”There exist two ways stop a server:
- Hit CTRL+C in the same TTY where you ran
tenzir-node. - Send the process a SIGINT or SIGTERM signal, e.g., via
pkill -2 tenzir-node.
Hitting CTRL+C is equivalent to manually sending a SIGTERM signal.
The recommended way to run a Tenzir node in AWS is with Elastic Container Service (ECS). The diagram below shows the high-level architecture of an AWS deployment.
You can deploy a Tenzir node using either CloudFormation for automated setup or manually through the AWS console. Both methods support deploying as many nodes as you need.
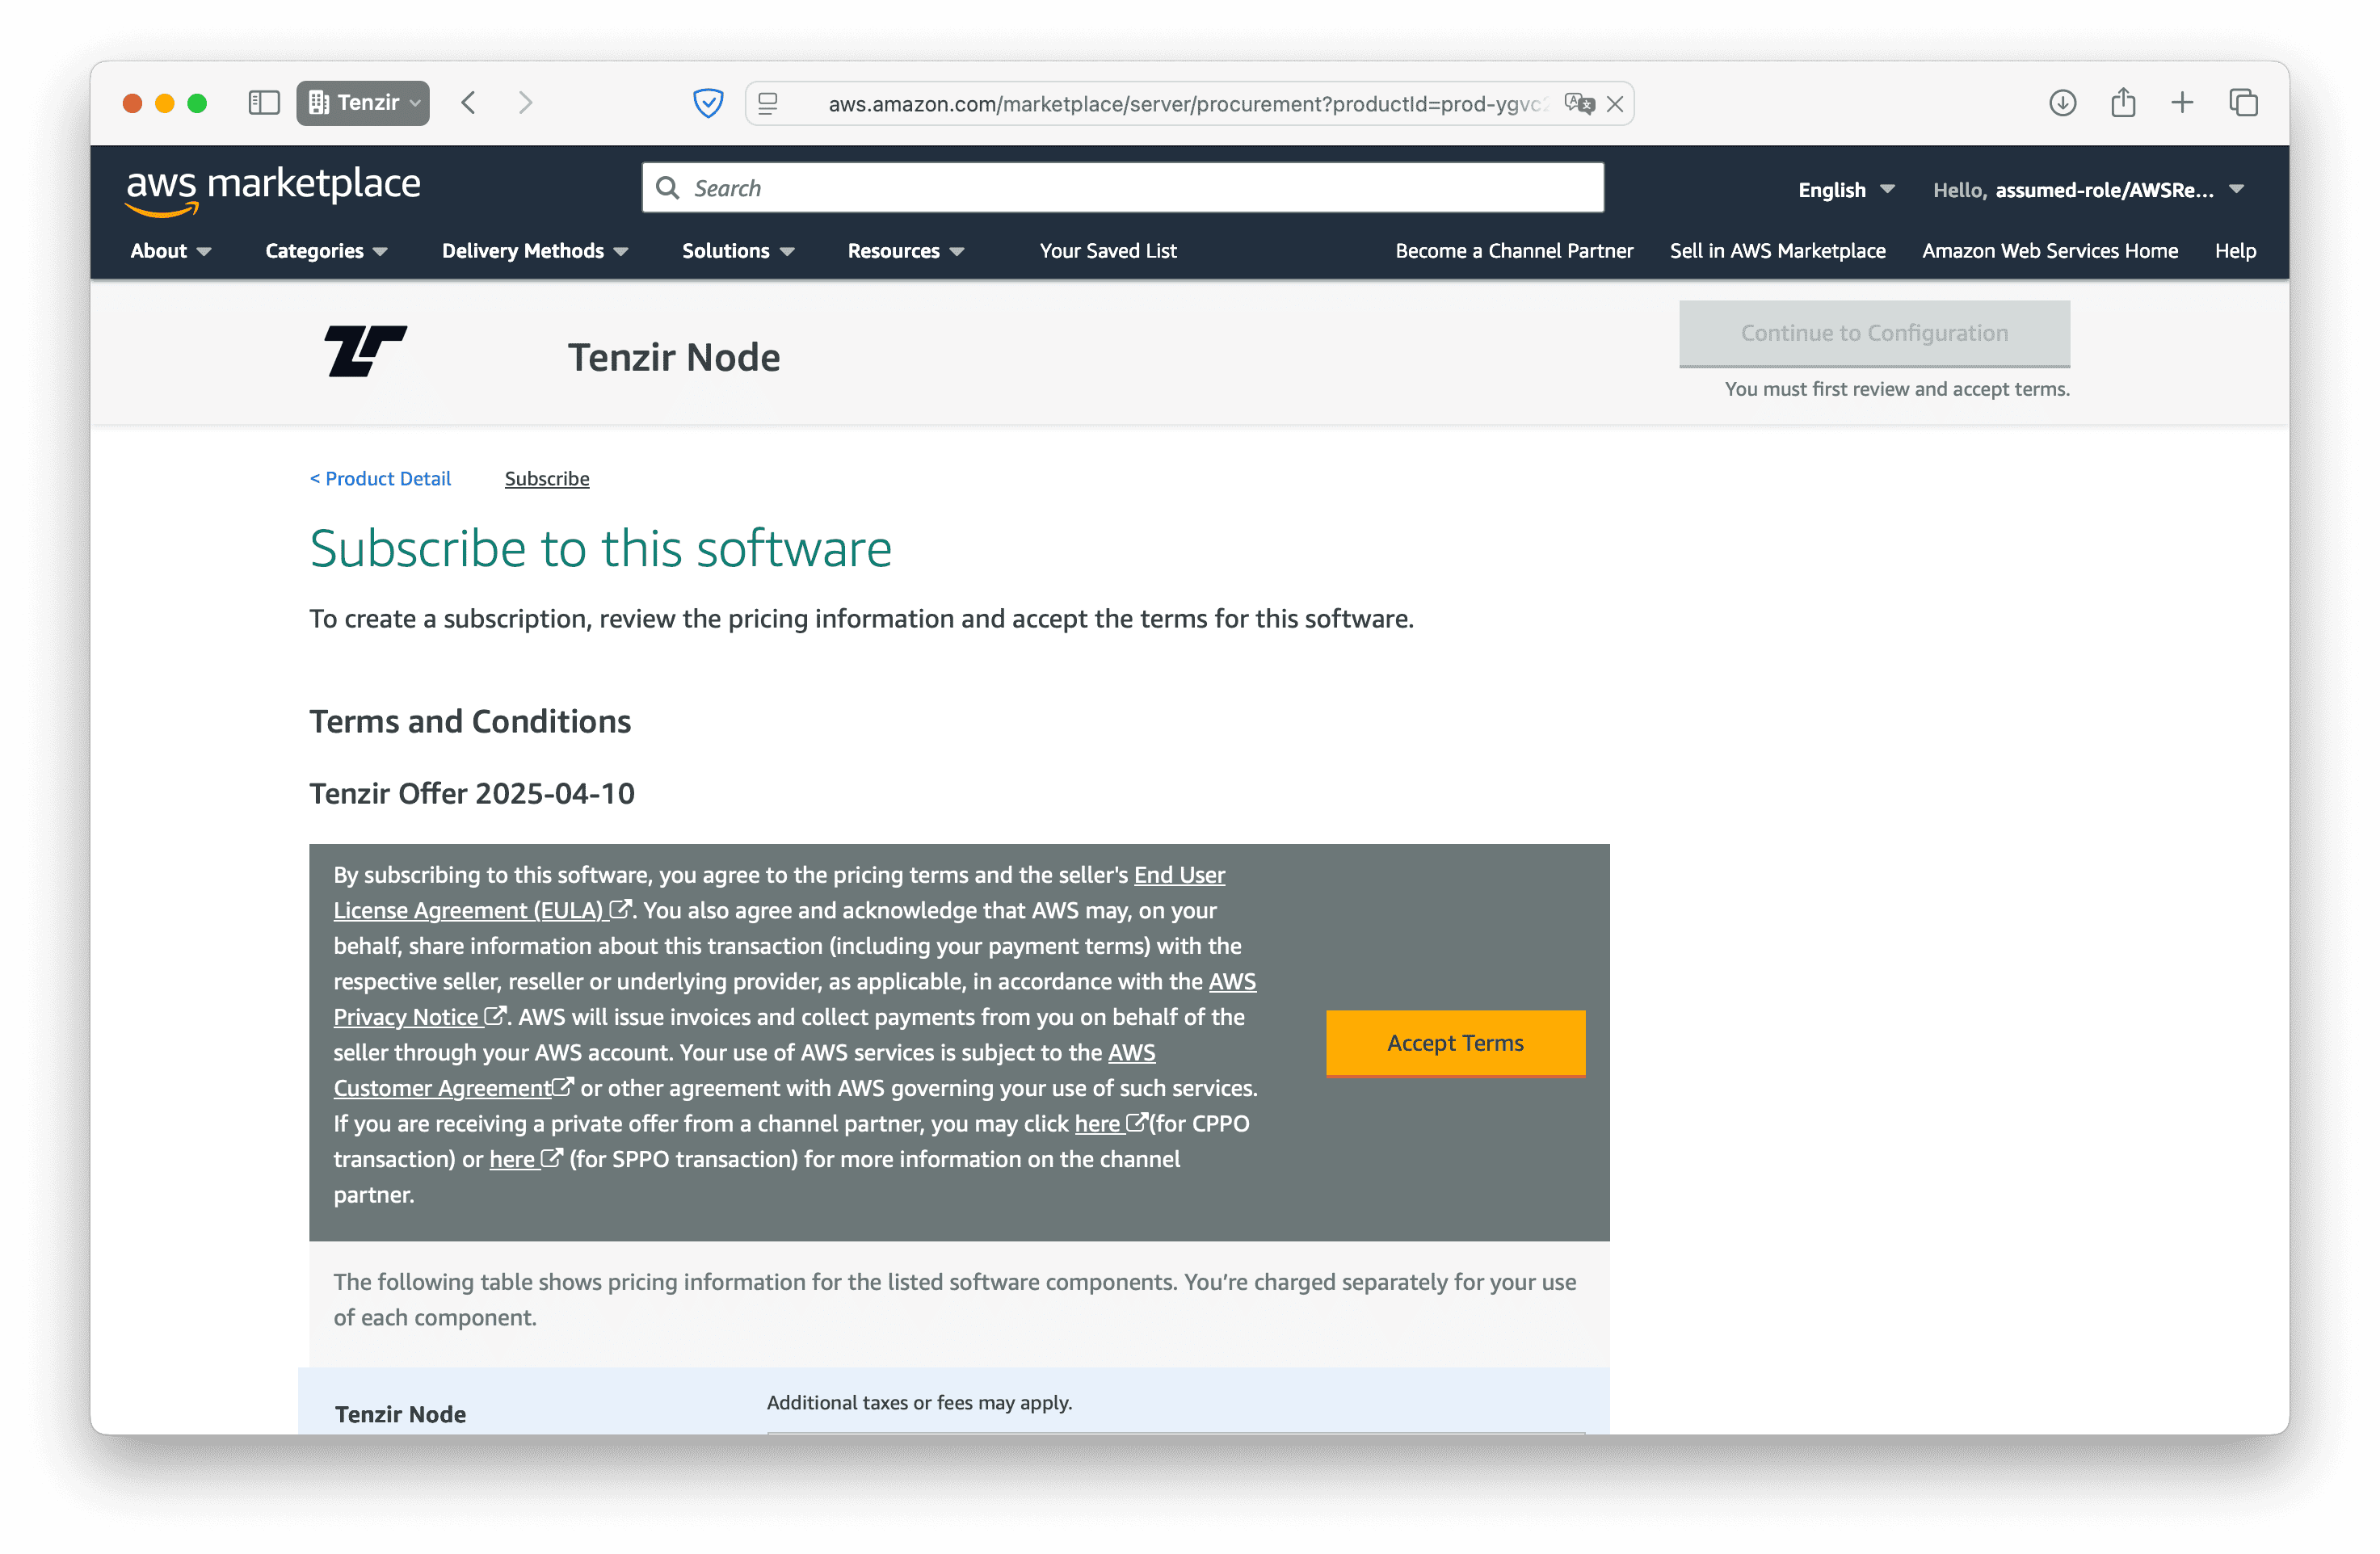
Subscribe to Tenzir Node on AWS Marketplace
Section titled “Subscribe to Tenzir Node on AWS Marketplace”Before deploying with either method, you need to subscribe to the Tenzir Node product:
-
Go to AWS Marketplace and subscribe to the free Tenzir Node product.
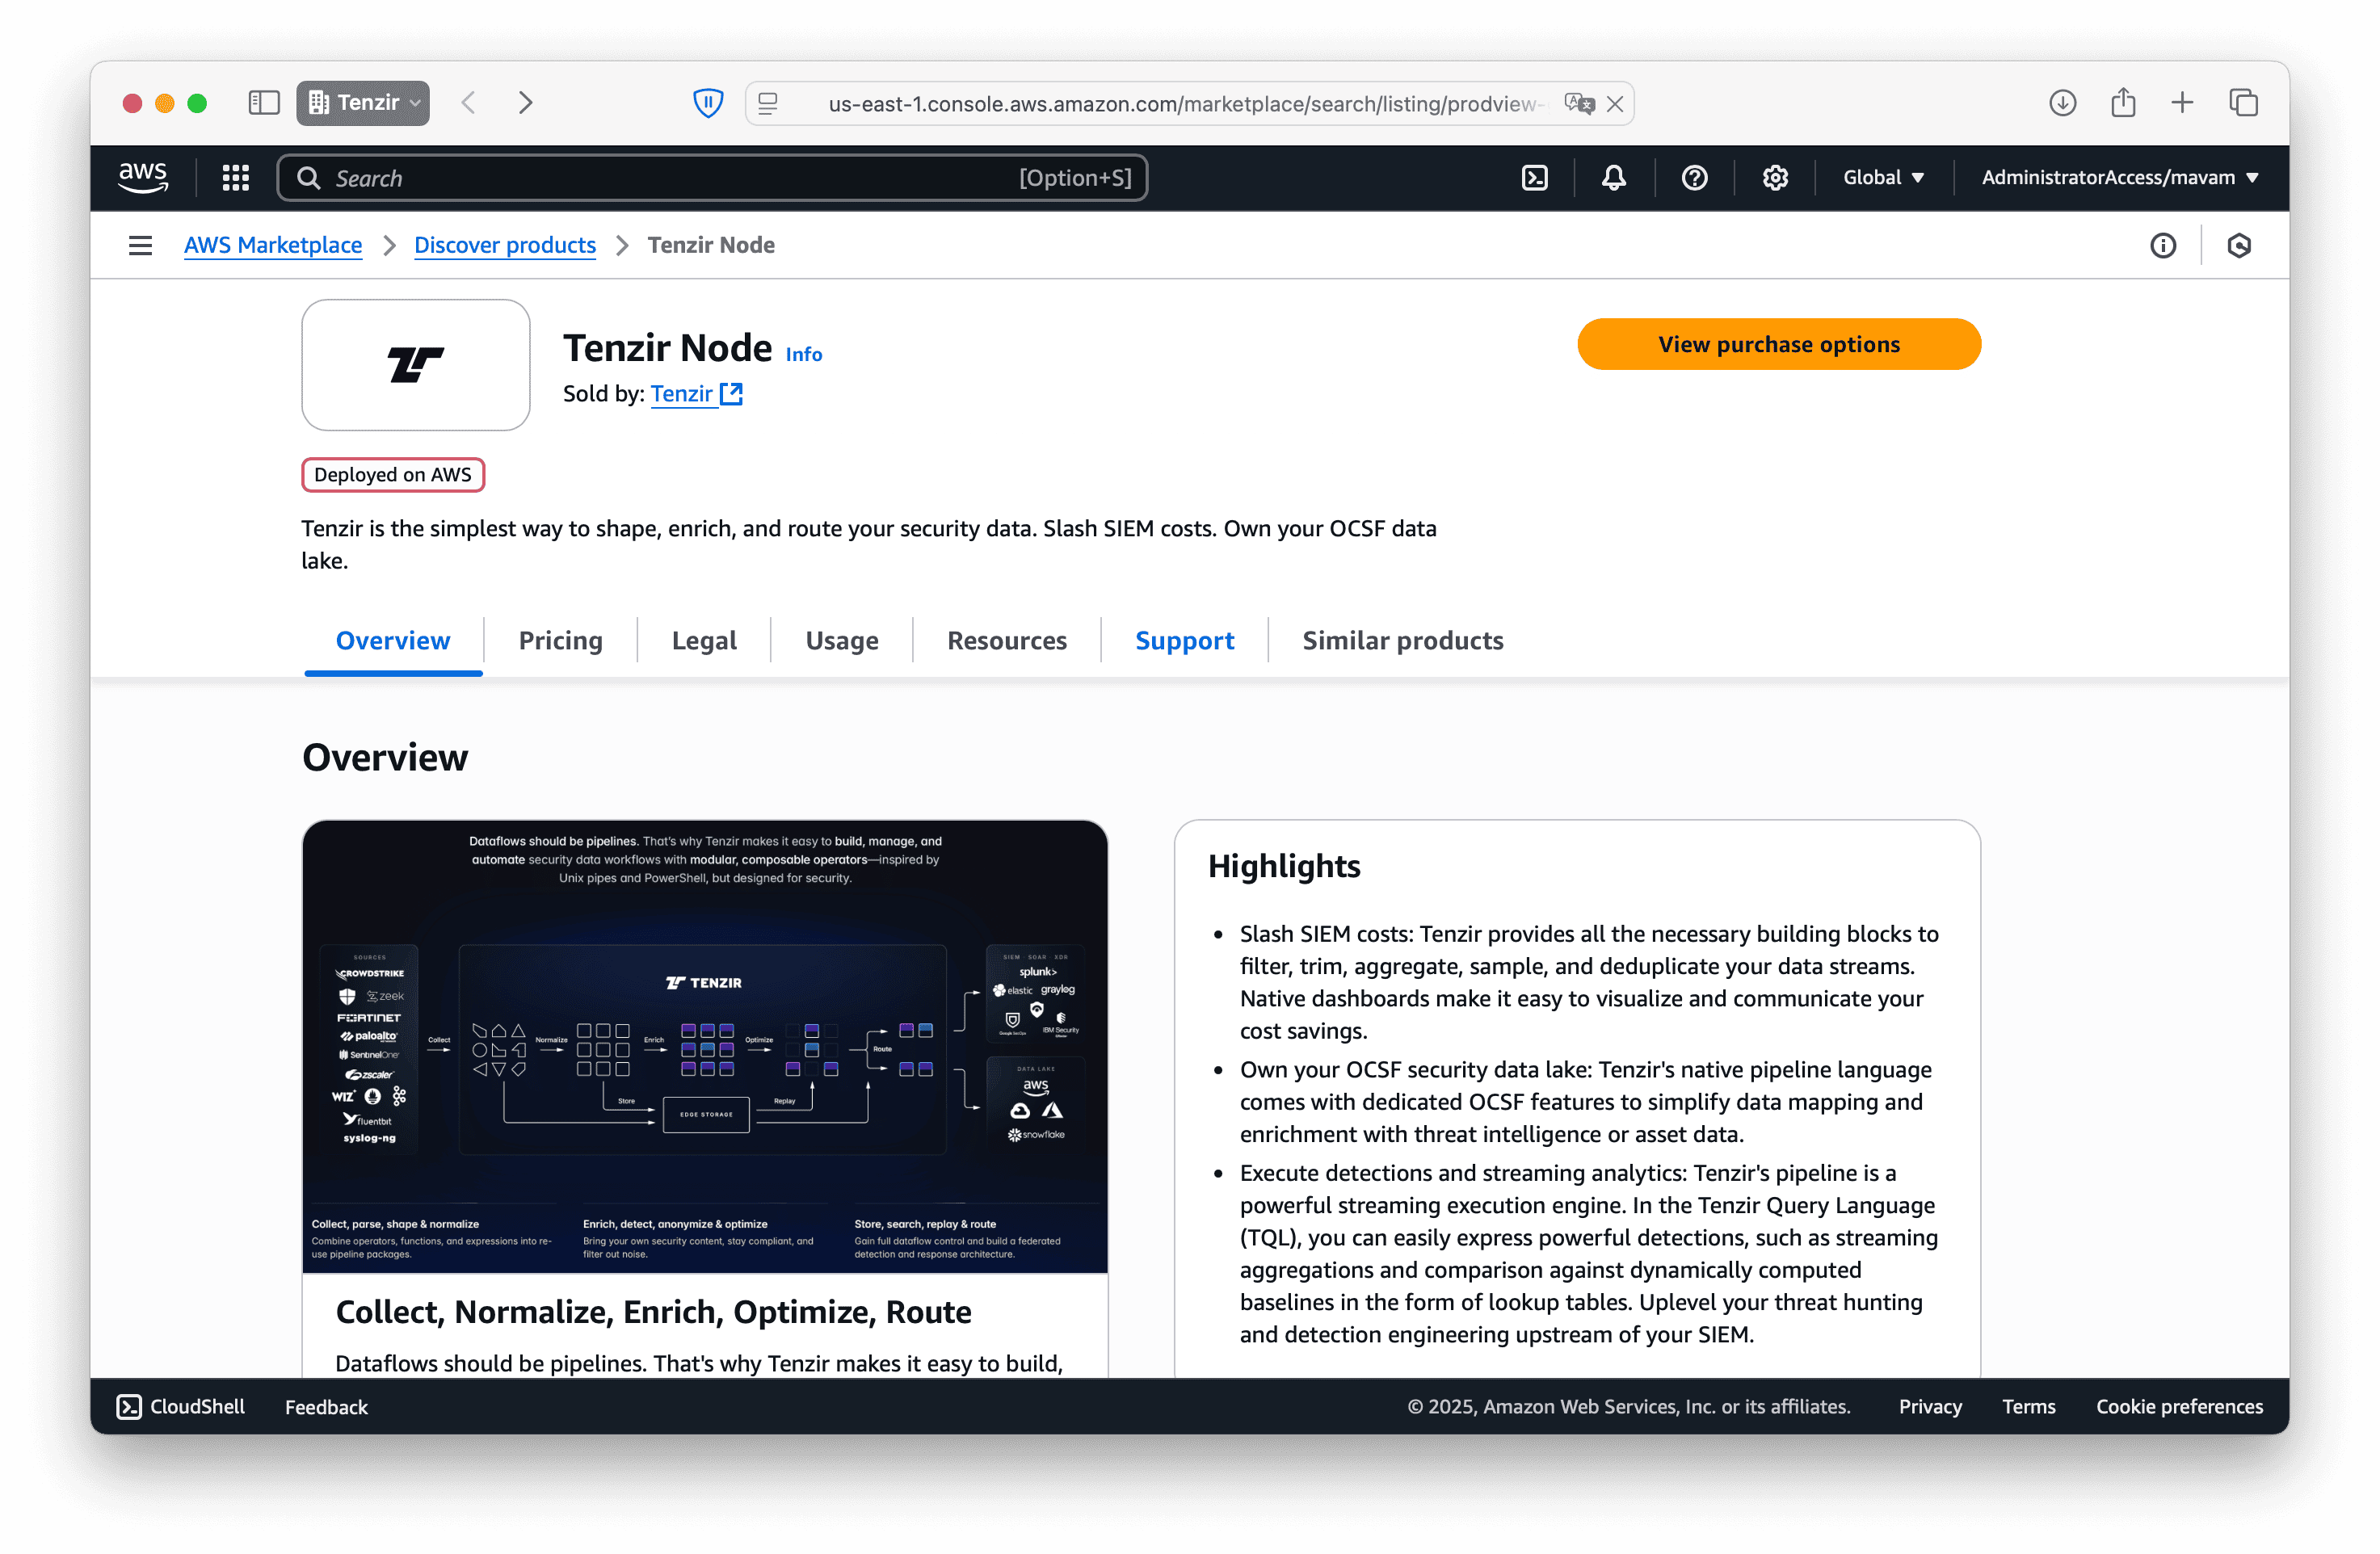
-
Accept the terms to subscribe to the offering.
Choose your deployment method
Section titled “Choose your deployment method”Deploy a Tenzir node using our CloudFormation template for automated setup. Click the button below to launch the CloudFormation console with our template pre-loaded:
Launch CloudFormation StackAfter clicking the button above, follow these steps in the AWS console:
-
Review the pre-filled template: The CloudFormation console will open with our single-node container template already loaded:
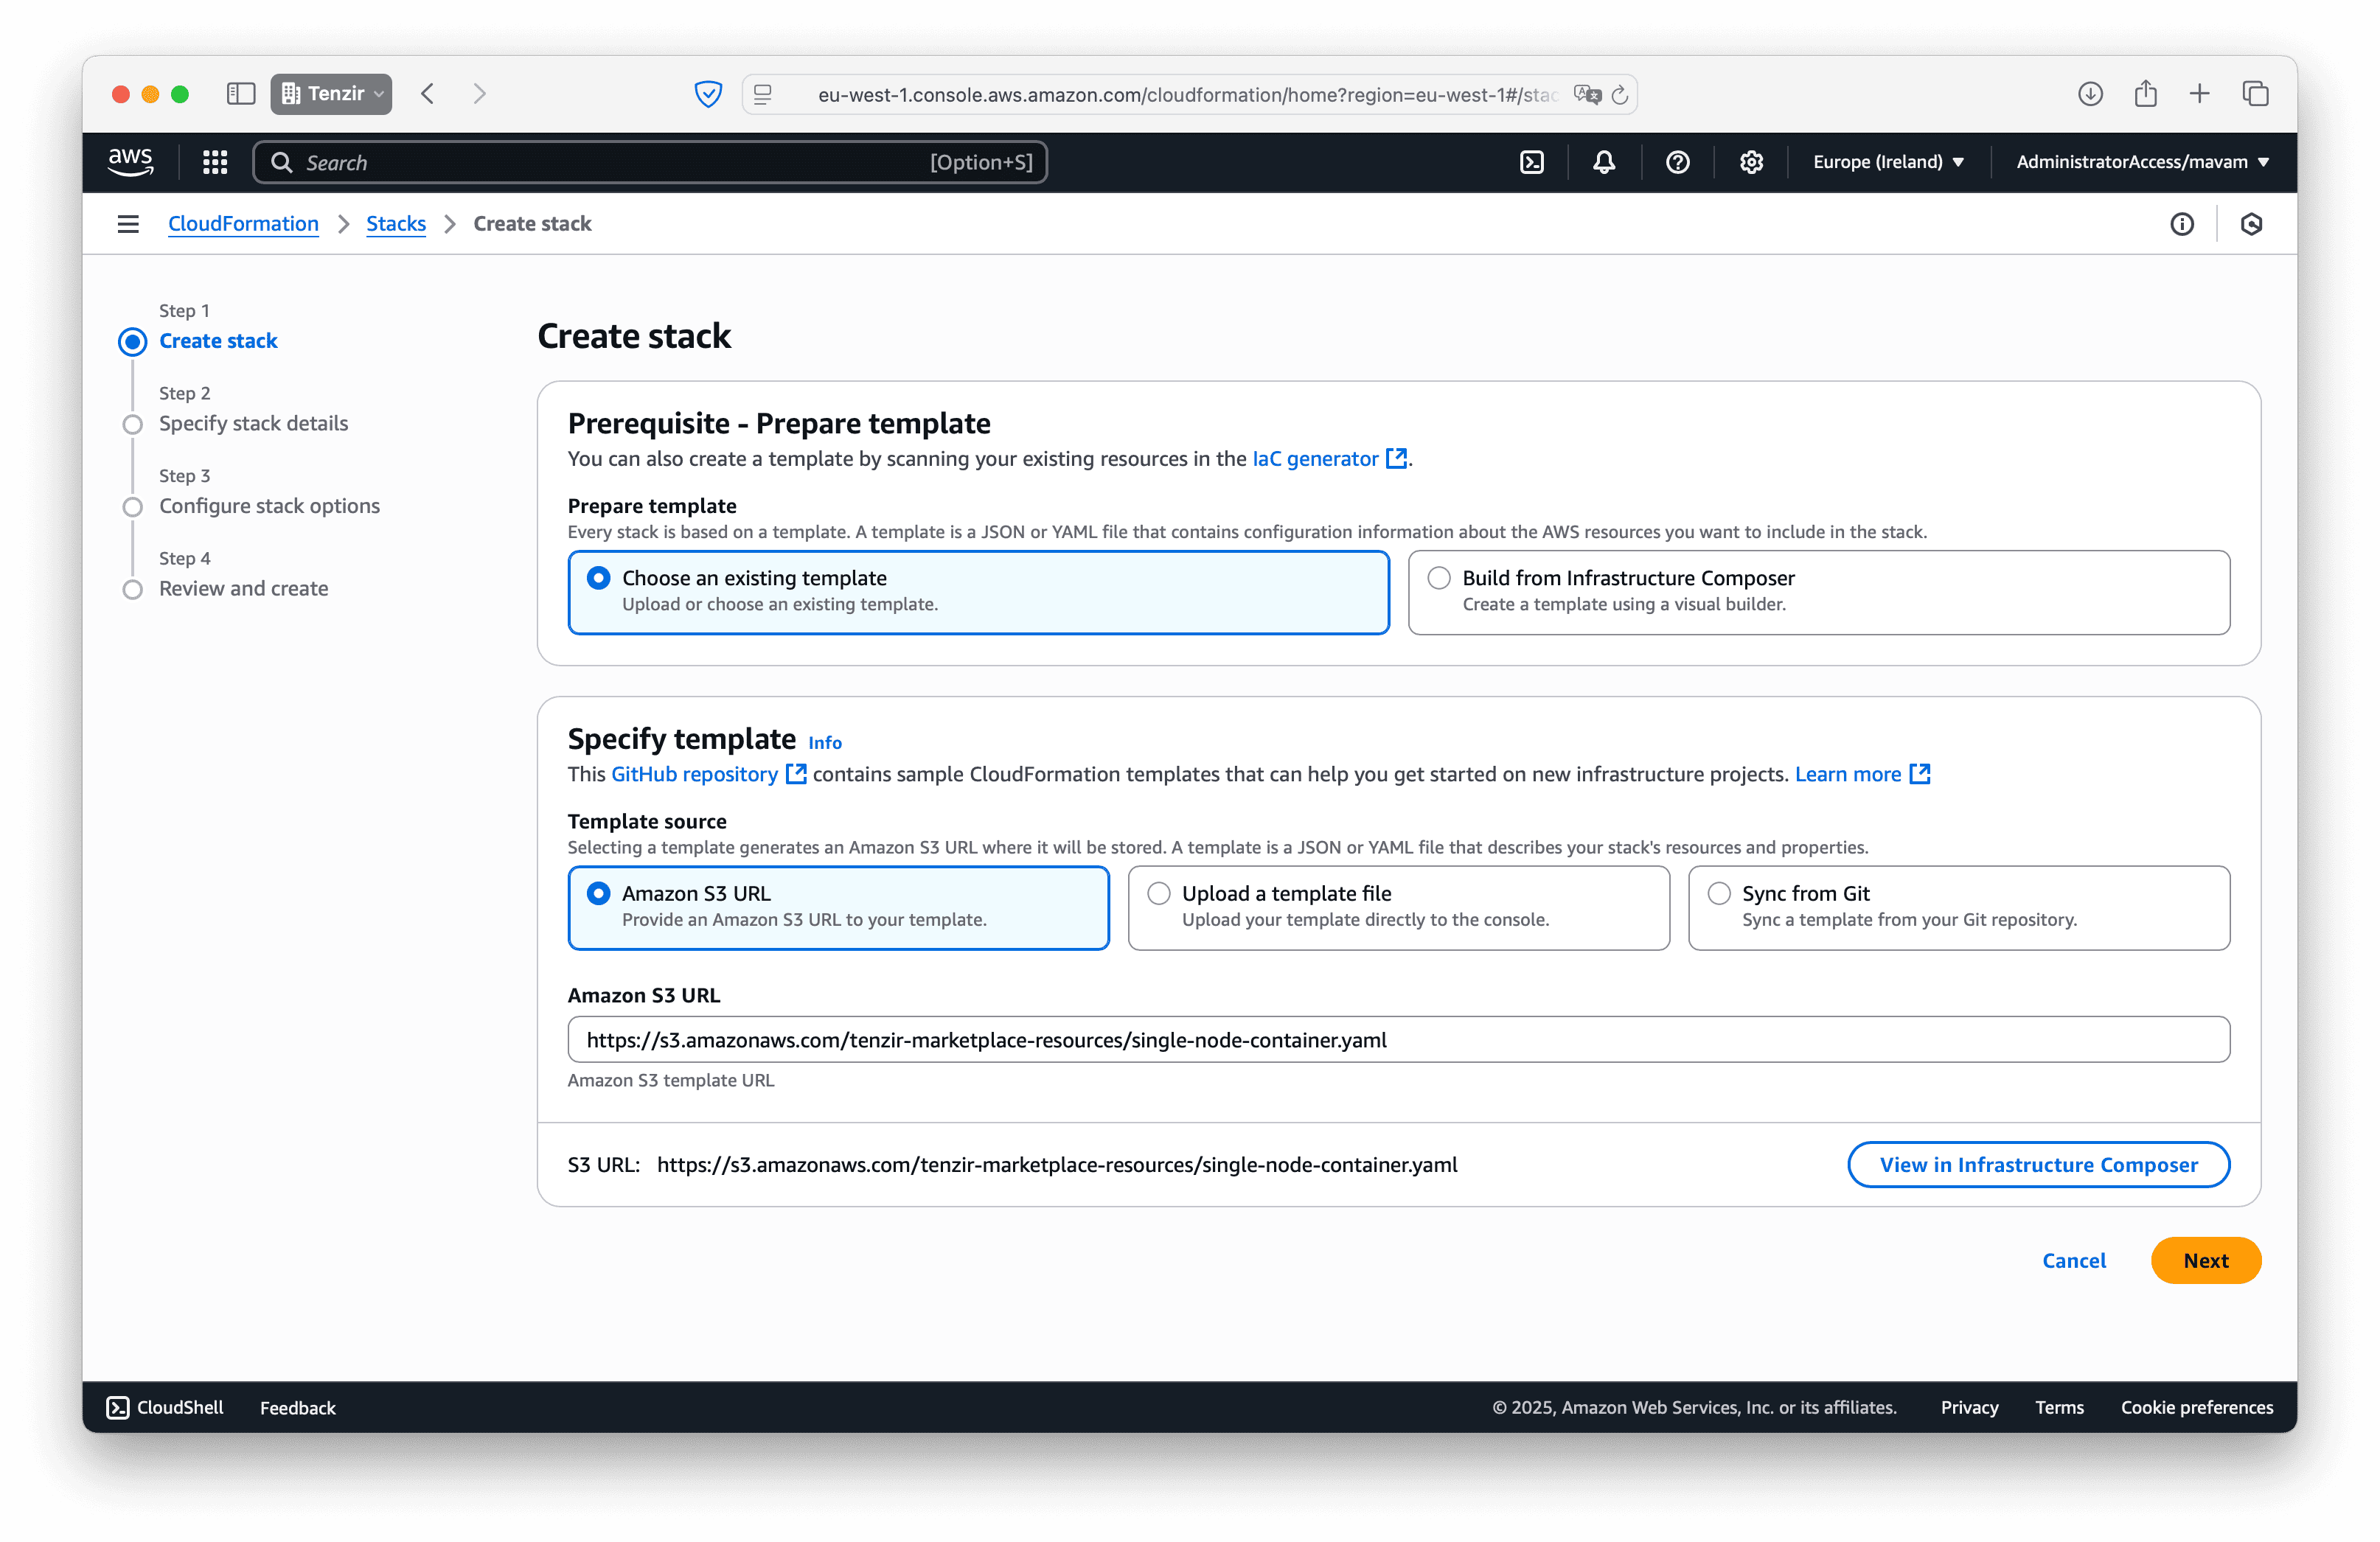
-
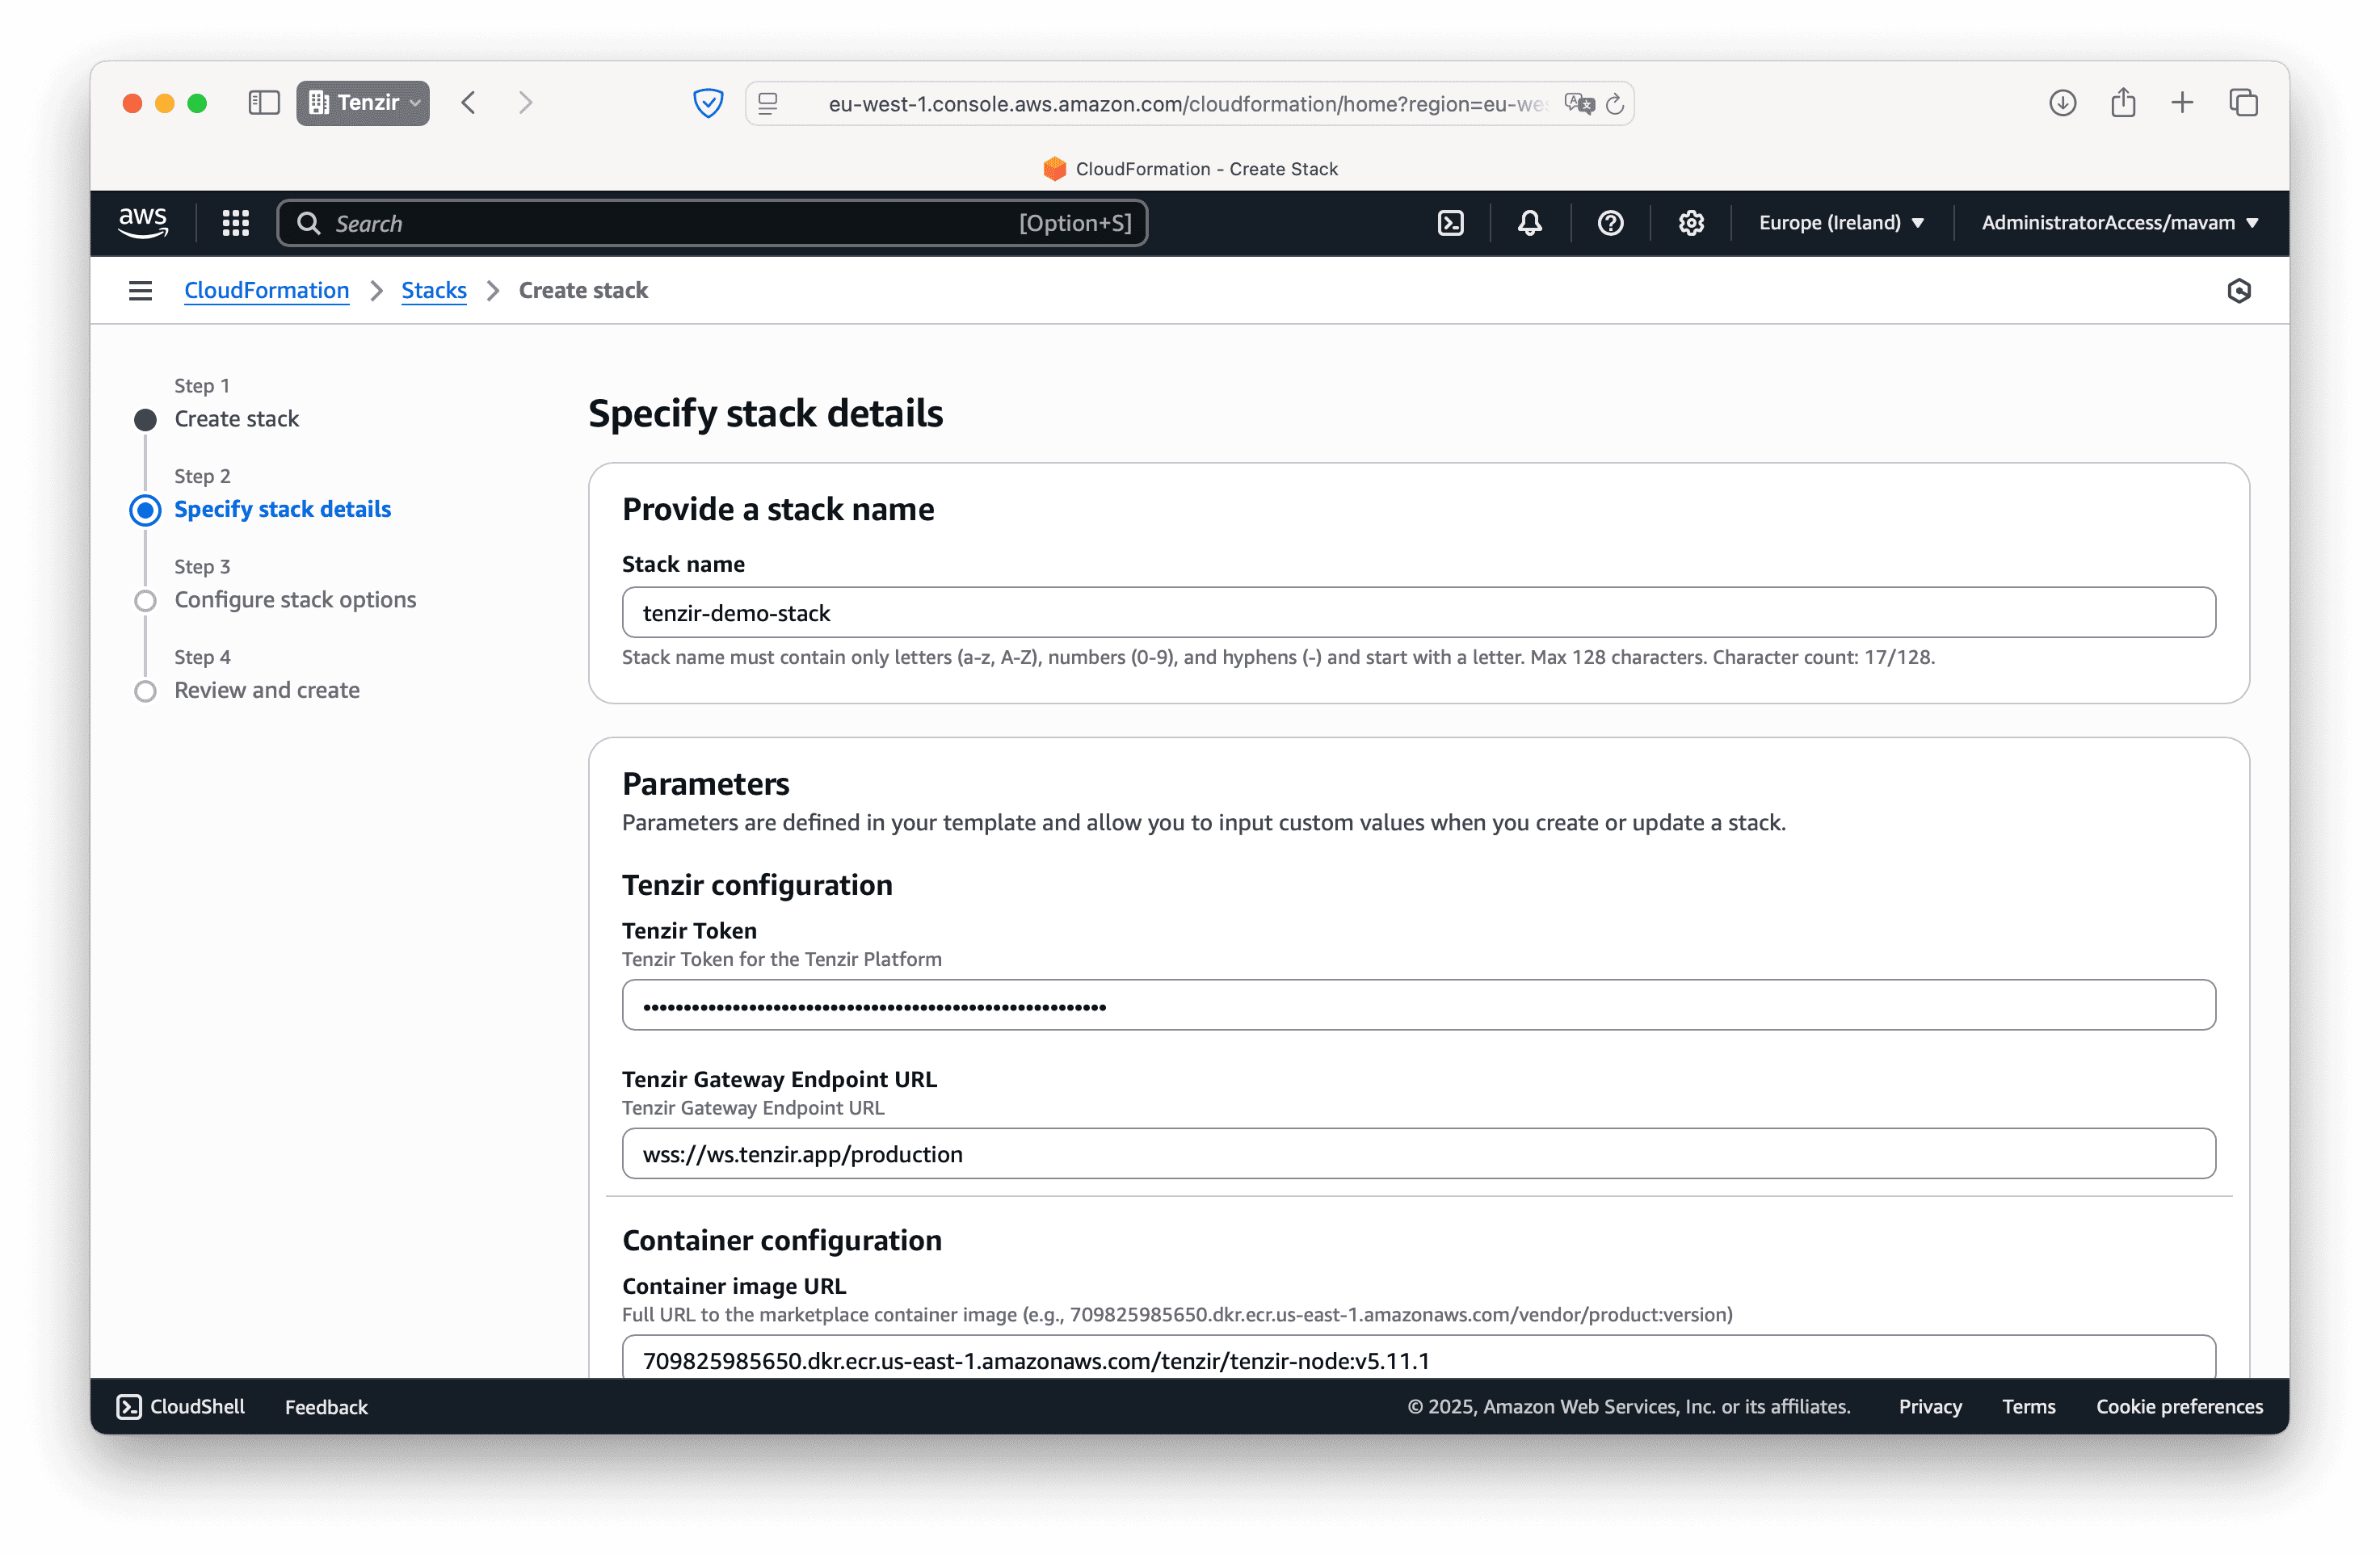
Configure your stack:
- Stack name: Choose a unique name for your stack (e.g.,
tenzir-node-prod) - Parameters: Enter your
TENZIR_TOKENin the provided field
Double-check that the container image URL points to the Tenzir Node version you want to deploy.
- Stack name: Choose a unique name for your stack (e.g.,
-
Accept the default stack options: For most deployments, the defaults work perfectly:
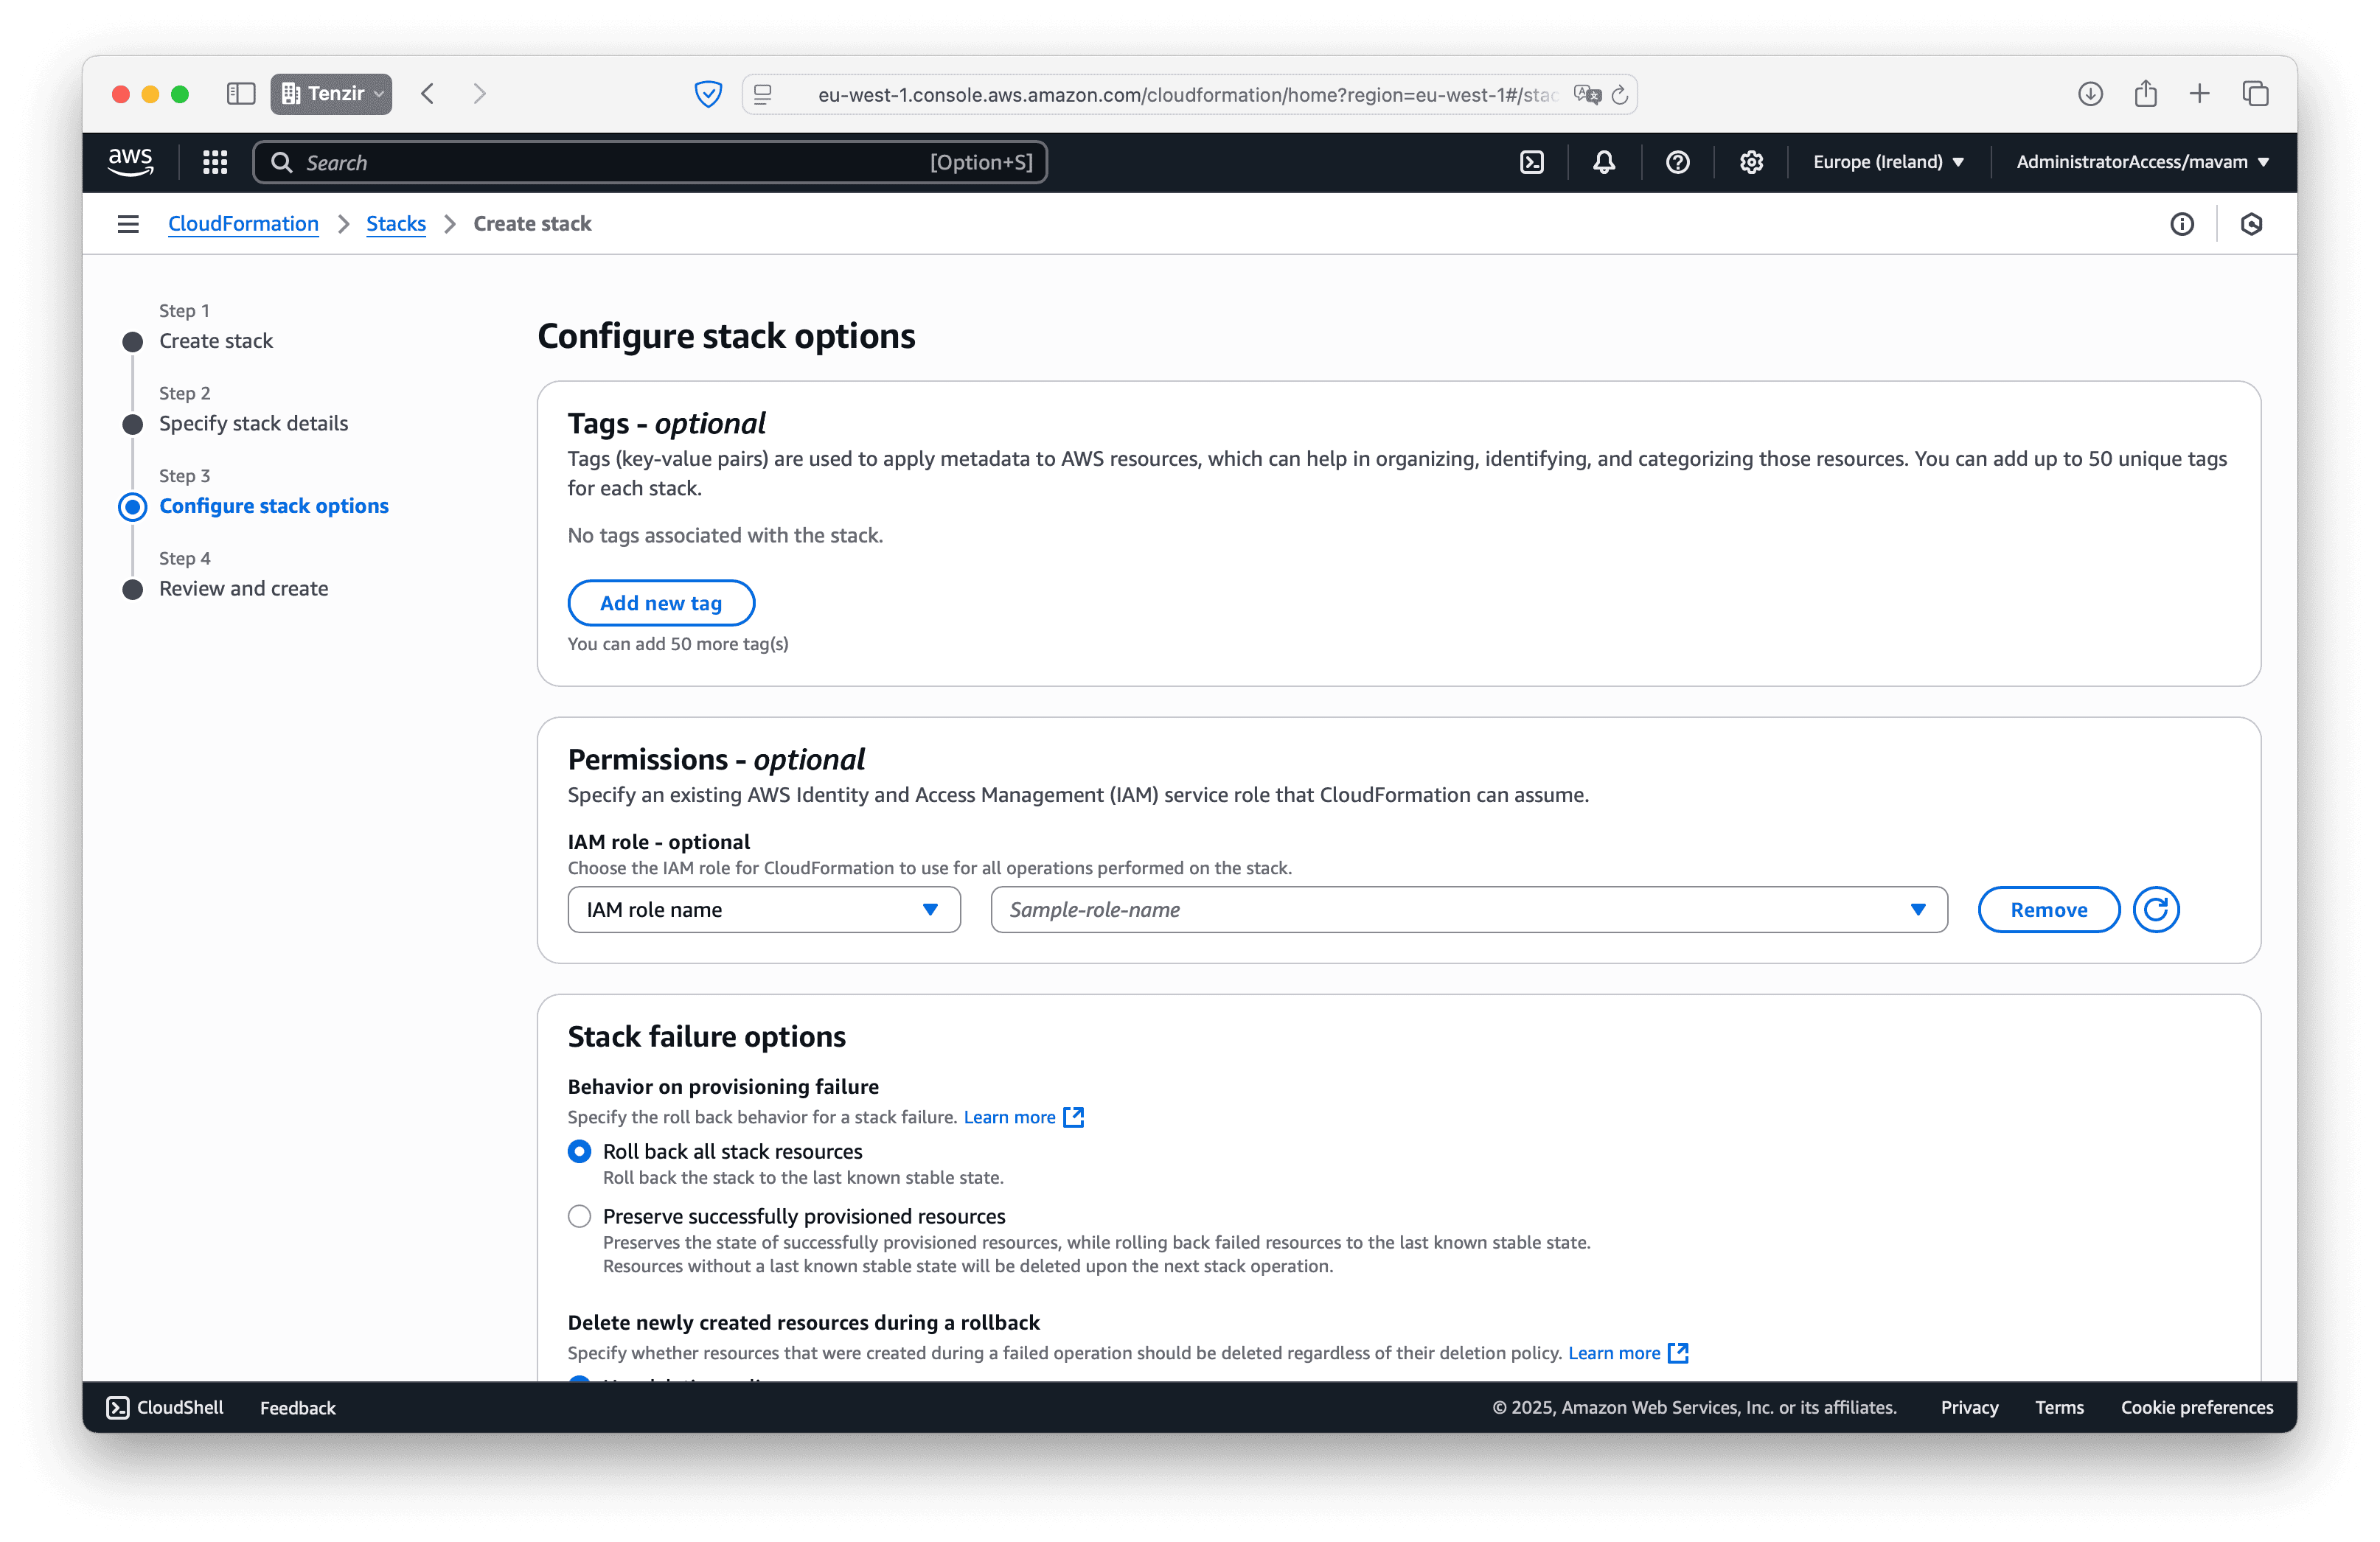
-
Review and acknowledge: Confirm your configuration and check the acknowledgment box:

-
Deploy your node: Click Submit to start the deployment. Monitor progress in the Events tab.
-
Wait for connection: Your node will automatically connect to your workspace once the stack creation completes (typically 2-3 minutes).
Update your node
Section titled “Update your node”To update your Tenzir node to a new version, you need to update the Container image URL parameter with a new version tag. The image URL format is:
709825985650.dkr.ecr.us-east-1.amazonaws.com/tenzir/tenzir-node:v<MAJOR>.<MINOR>.<PATCH>Replace v<MAJOR>.<MINOR>.<PATCH> with the desired version (e.g., v4.30.3).
Check our changelog for the latest version.
- Navigate to CloudFormation in the AWS console.
- Select your stack and click Update.
- Choose Use current template and click Next.
- Update the Container image URL parameter with the new version.
- Click through the remaining screens and submit the update.
aws cloudformation update-stack \ --stack-name tenzir-node-prod \ --use-previous-template \ --parameters \ ParameterKey=ContainerImageUrl,ParameterValue=709825985650.dkr.ecr.us-east-1.amazonaws.com/tenzir/tenzir-node:v4.30.3 \ ParameterKey=TenzirToken,UsePreviousValue=true \ --capabilities CAPABILITY_IAMReplace tenzir-node-prod with your stack name and v4.30.3 with the desired version.
Your node will restart with the new version automatically.
Delete your node
Section titled “Delete your node”To remove the node and all associated resources, delete the stack.
- Navigate to CloudFormation in the AWS console.
- Select your stack and click Delete.
- Confirm the deletion.
aws cloudformation delete-stack --stack-name tenzir-node-prodReplace tenzir-node-prod with your stack name.
Follow these steps for manual deployment through the AWS console:
-
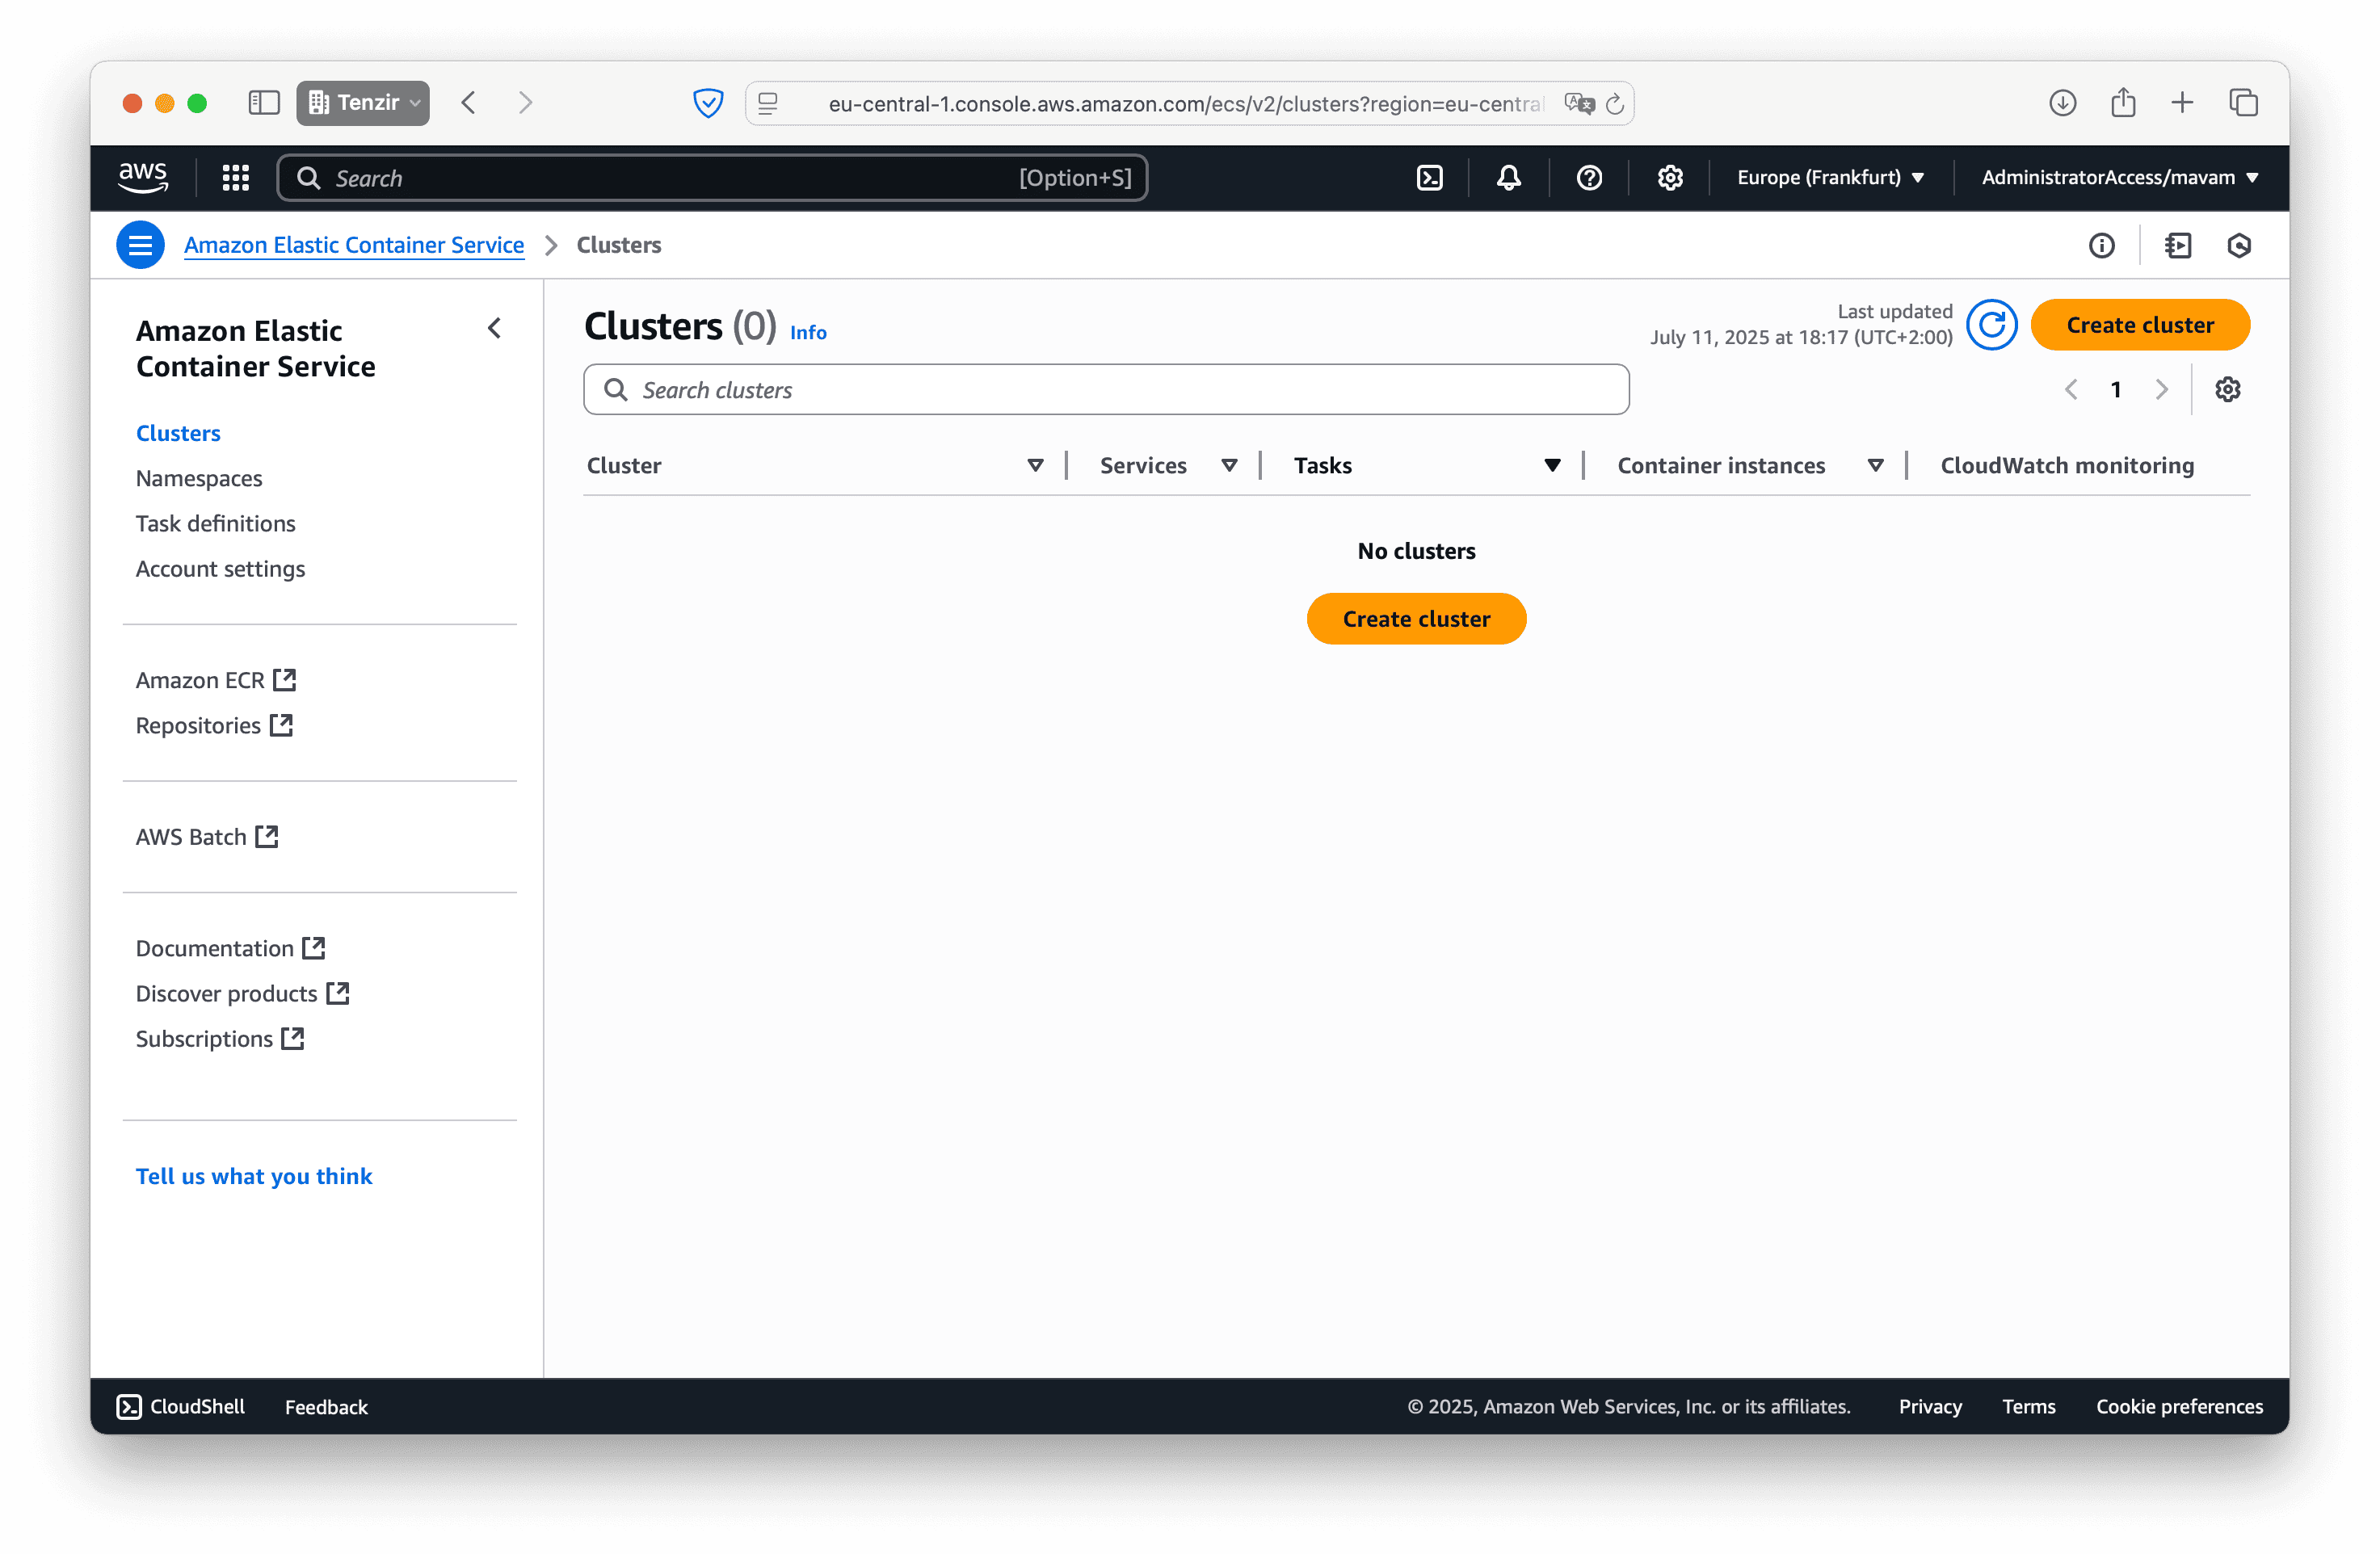
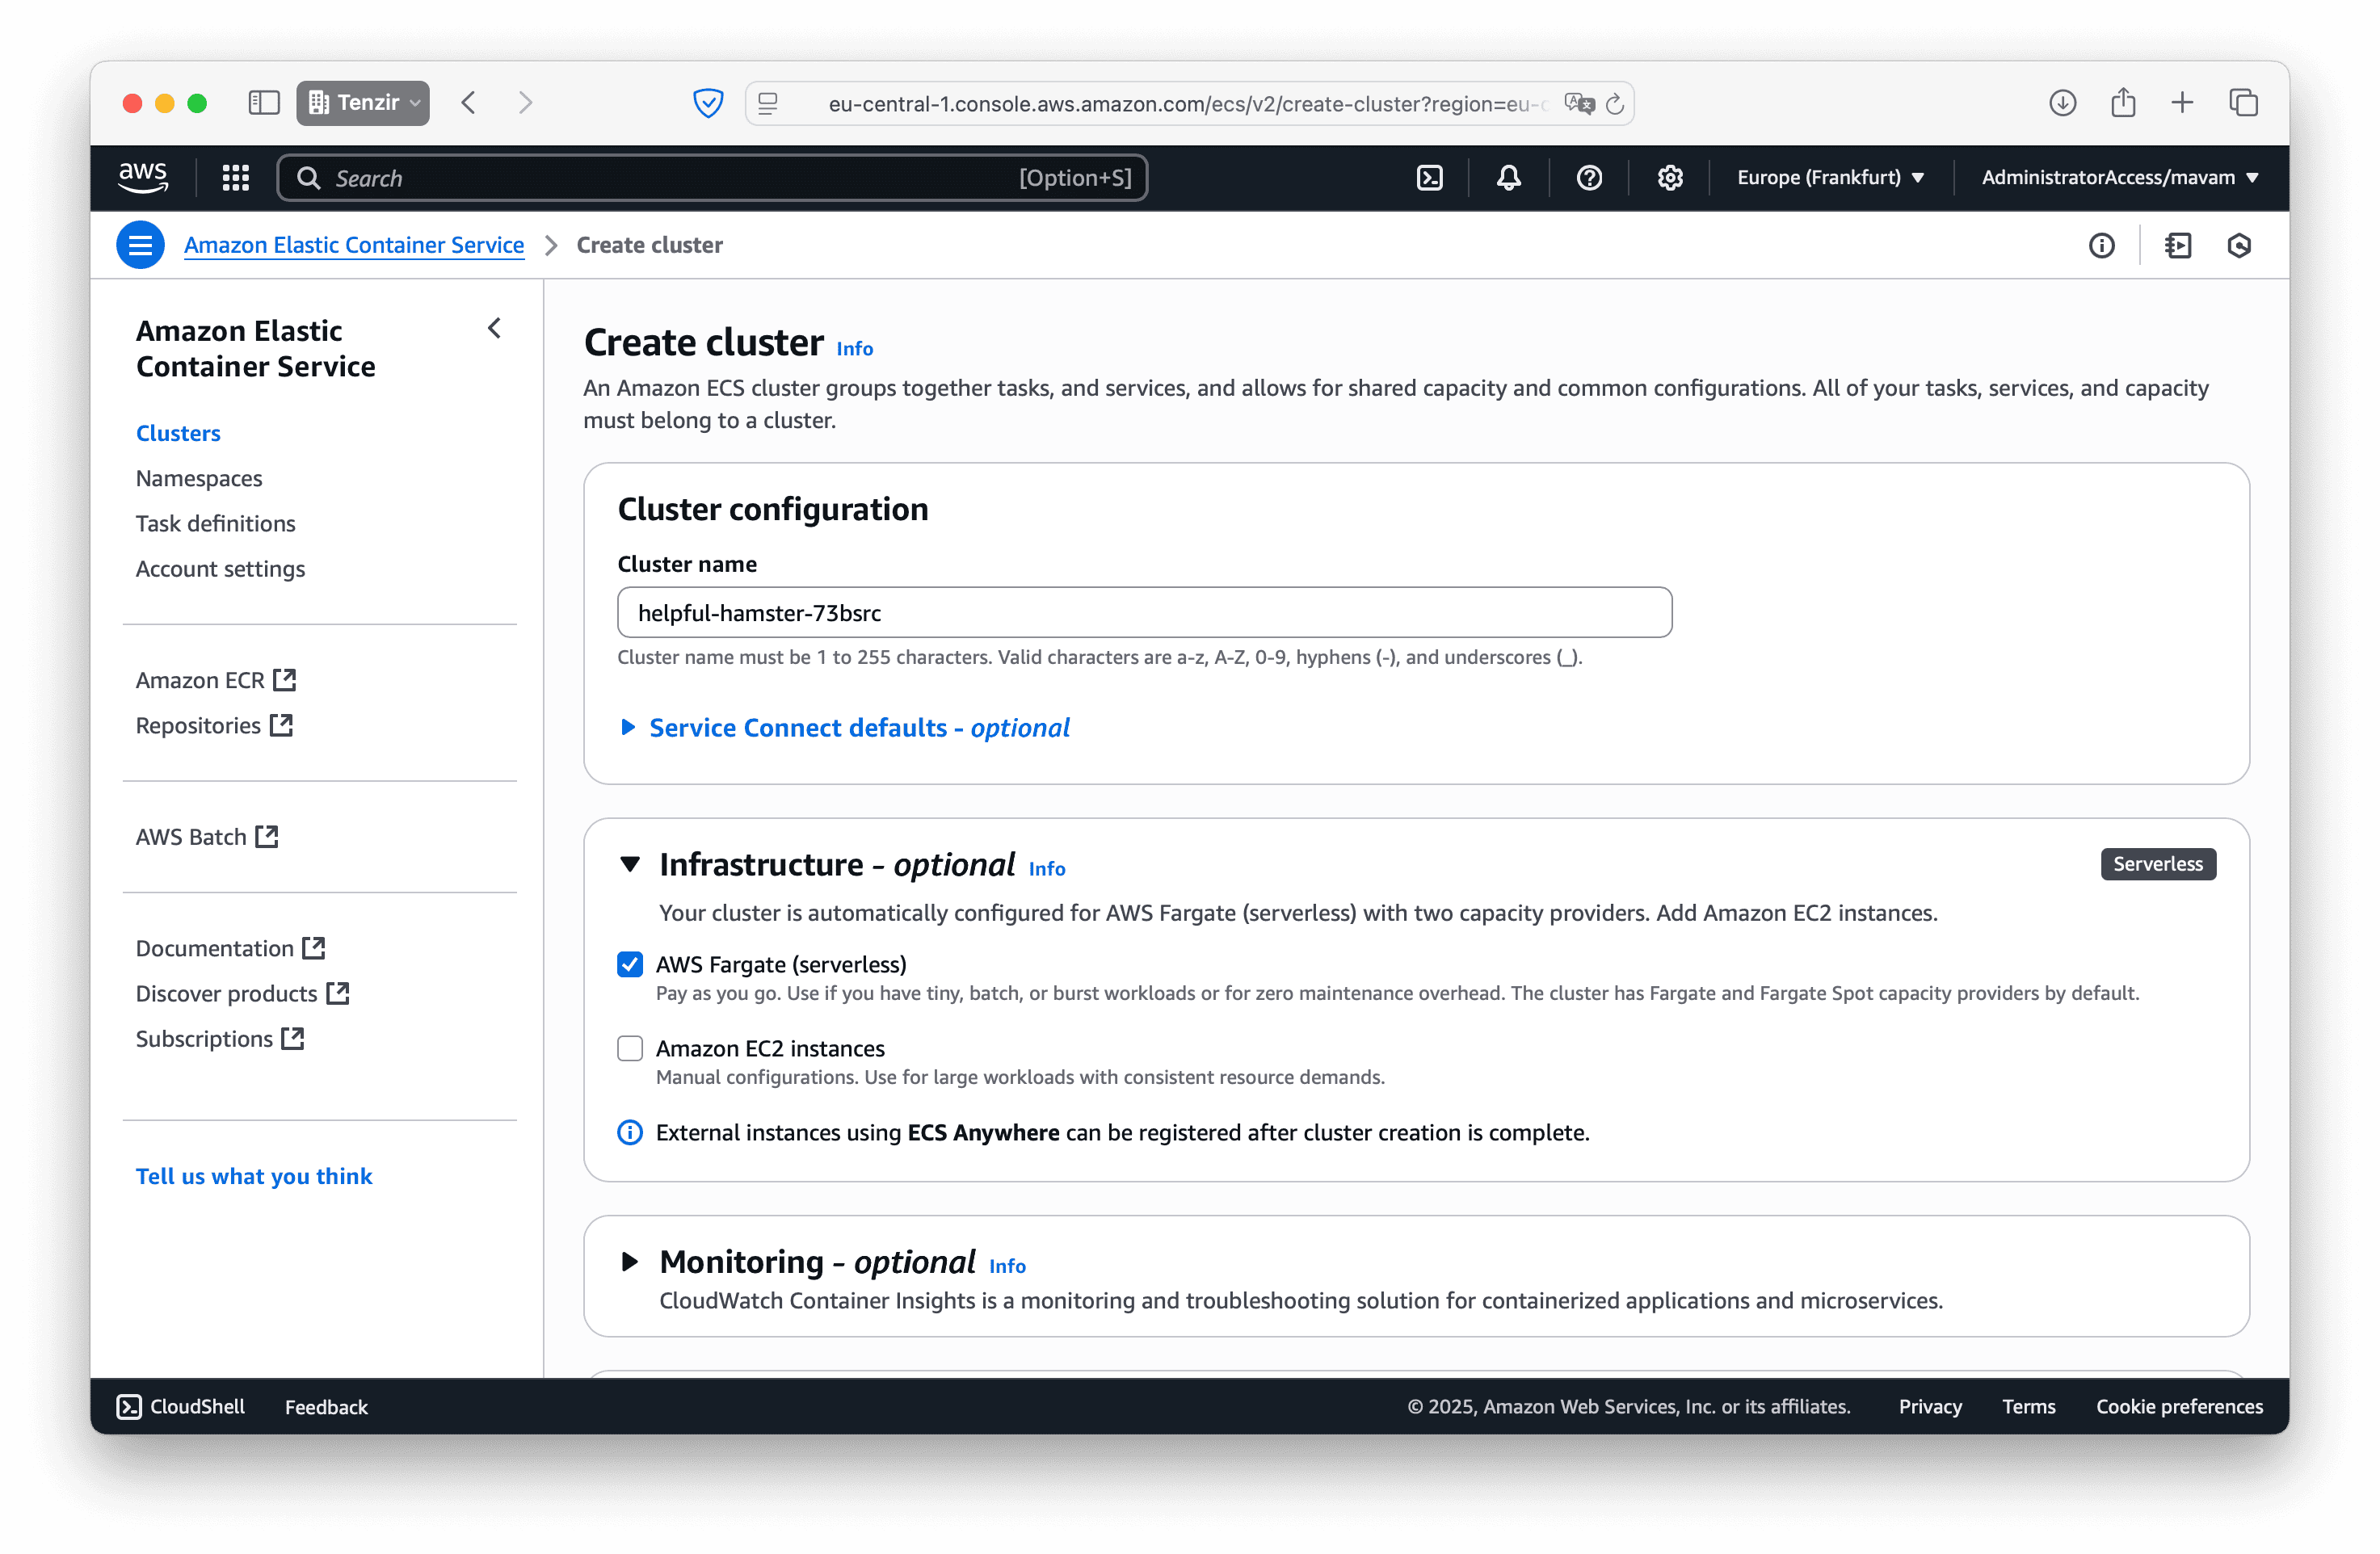
Navigate to Amazon Elastic Container Service (ECS).
-
Create a new cluster. Choose between EC2 or Fargate based on your needs:
- EC2 clusters give you full control over the underlying instances. They’re ideal for long-running workloads with consistent resource requirements.
- Fargate clusters provide serverless container execution where you pay only for the resources you use. They’re cost-effective for workloads with variable demand.
-
Create a task definition to specify how the Tenzir node container should run.
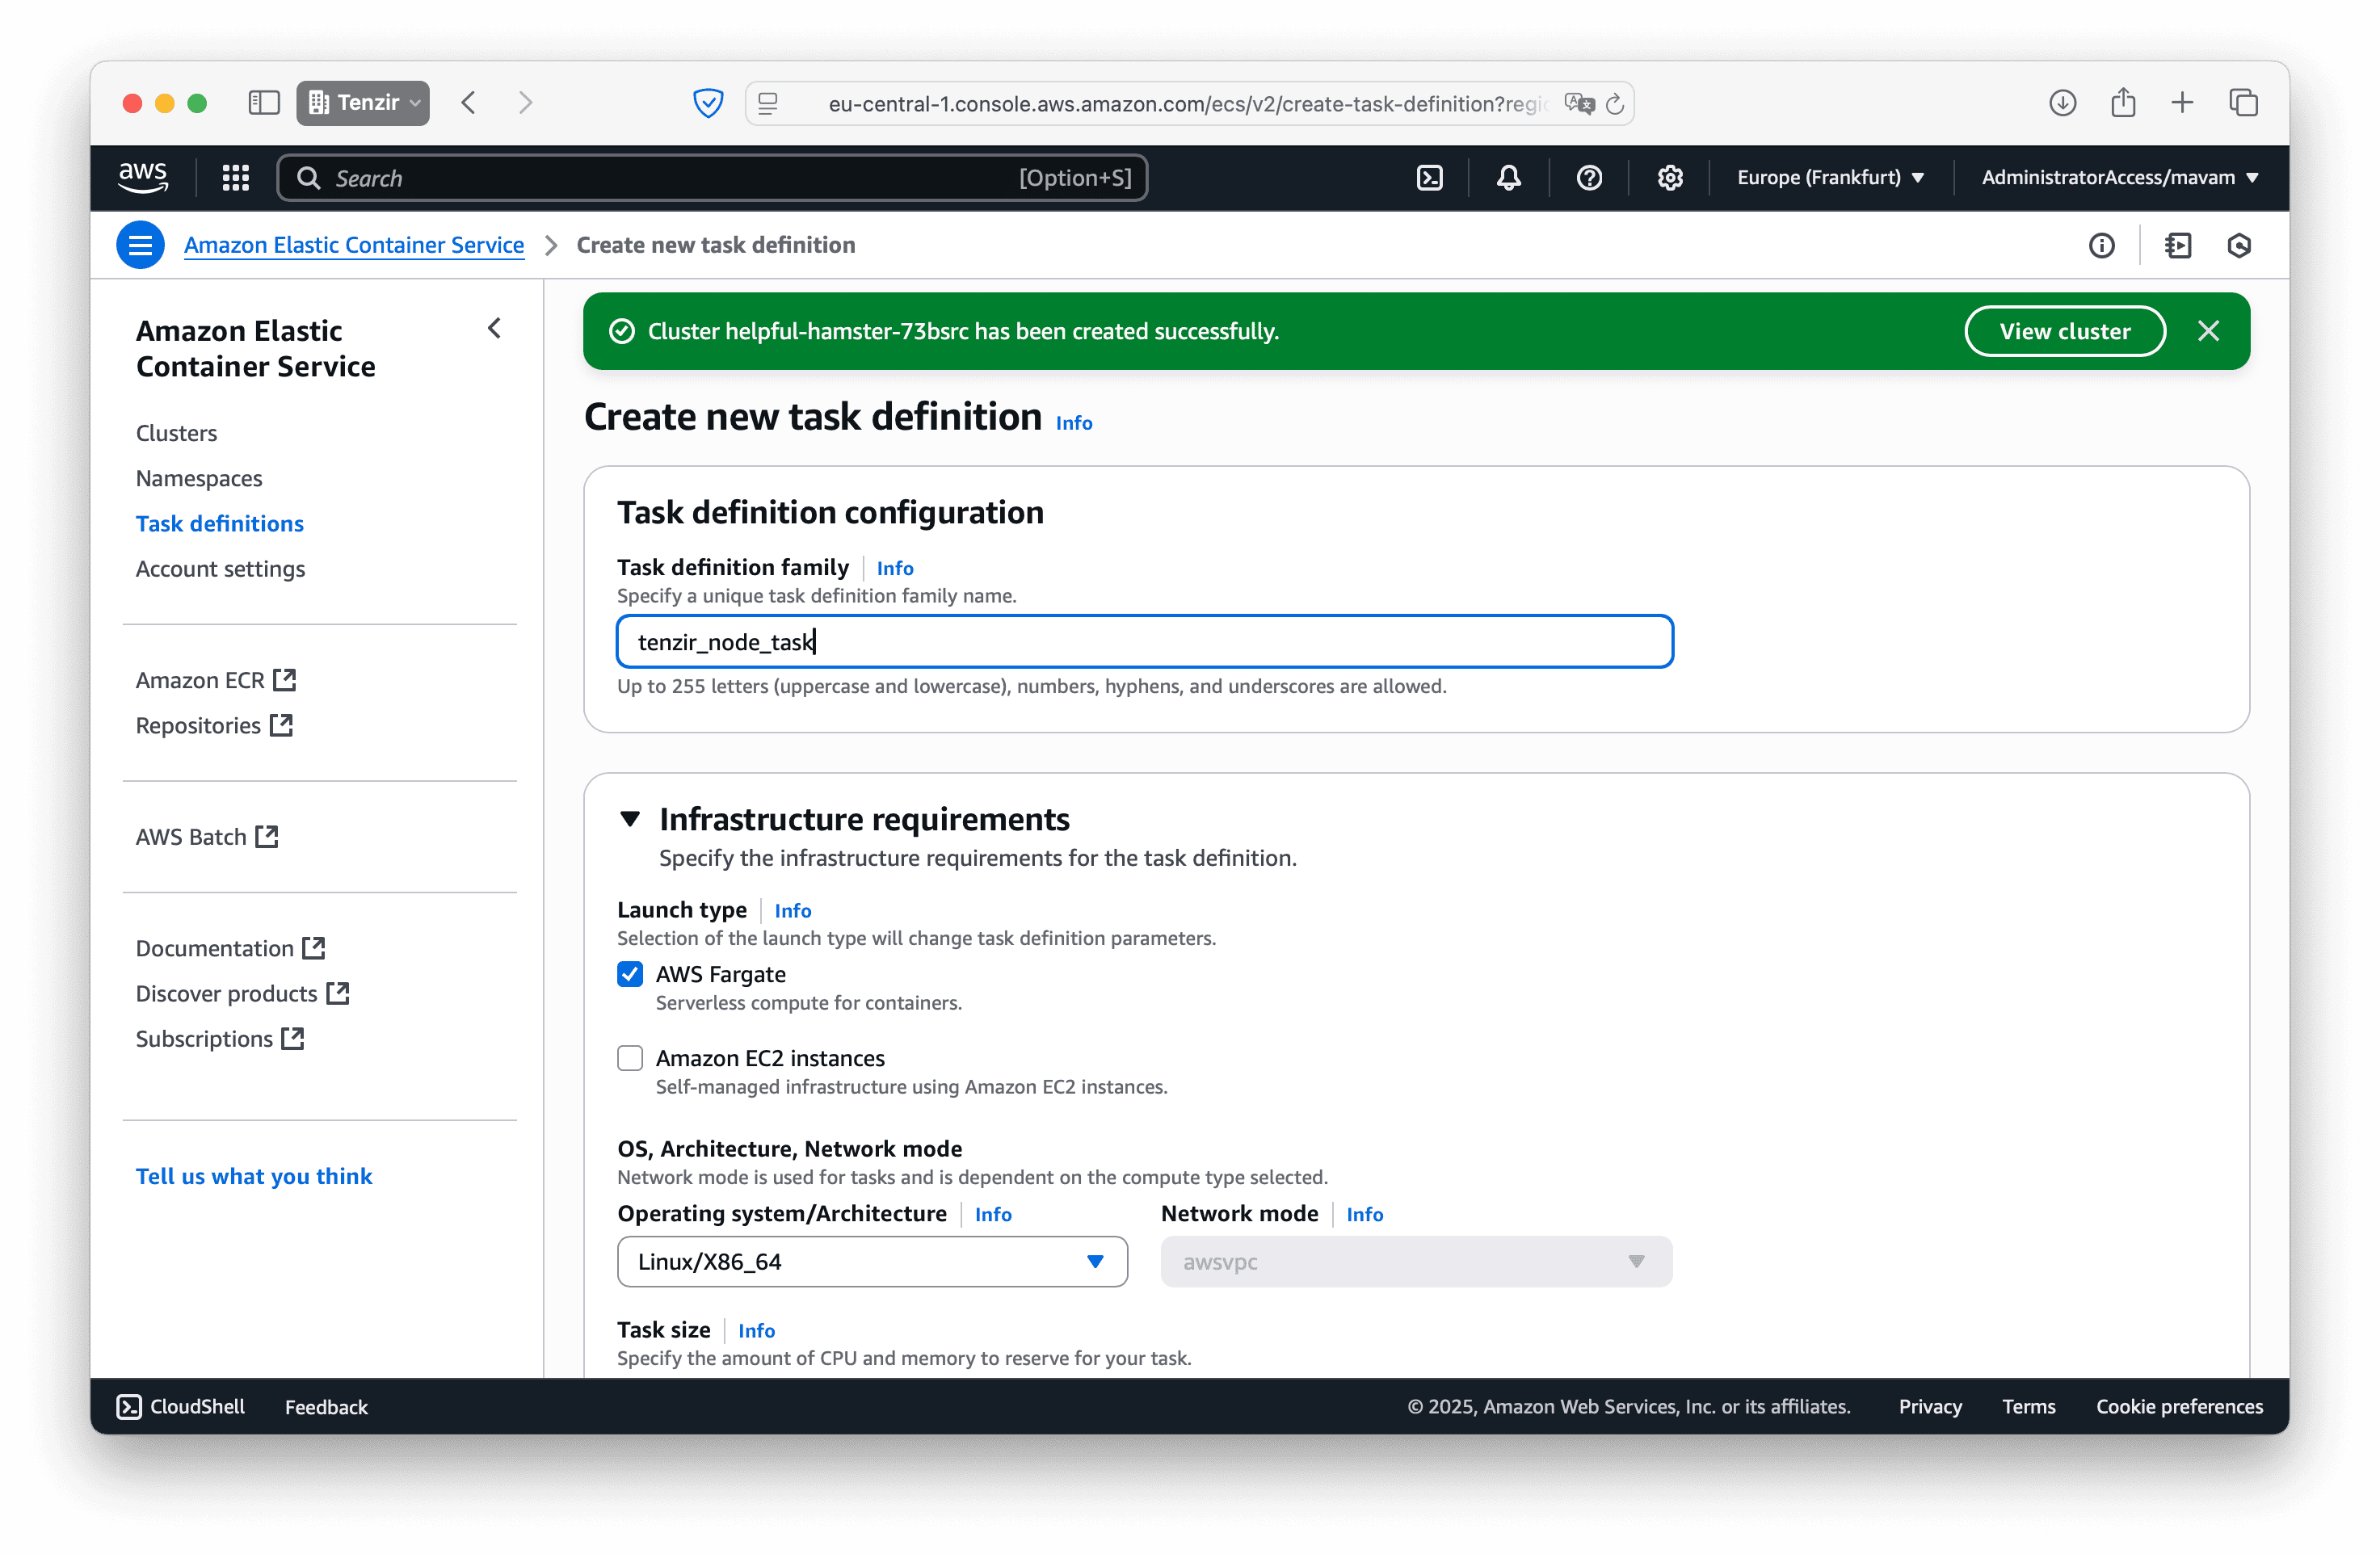
In the Containers section, enter the repository URL from your AWS Marketplace subscription:
709825985650.dkr.ecr.us-east-1.amazonaws.com/tenzir/tenzir-node:v<MAJOR>.<MINOR>.<PATCH>Each node version has its own image tag. Replace
v<MAJOR>.<MINOR>.<PATCH>with the desired version. Check the changelog for the latest version. -
Return to your cluster, navigate to the Tasks tab, and click Run new task. Select the task definition you just created.
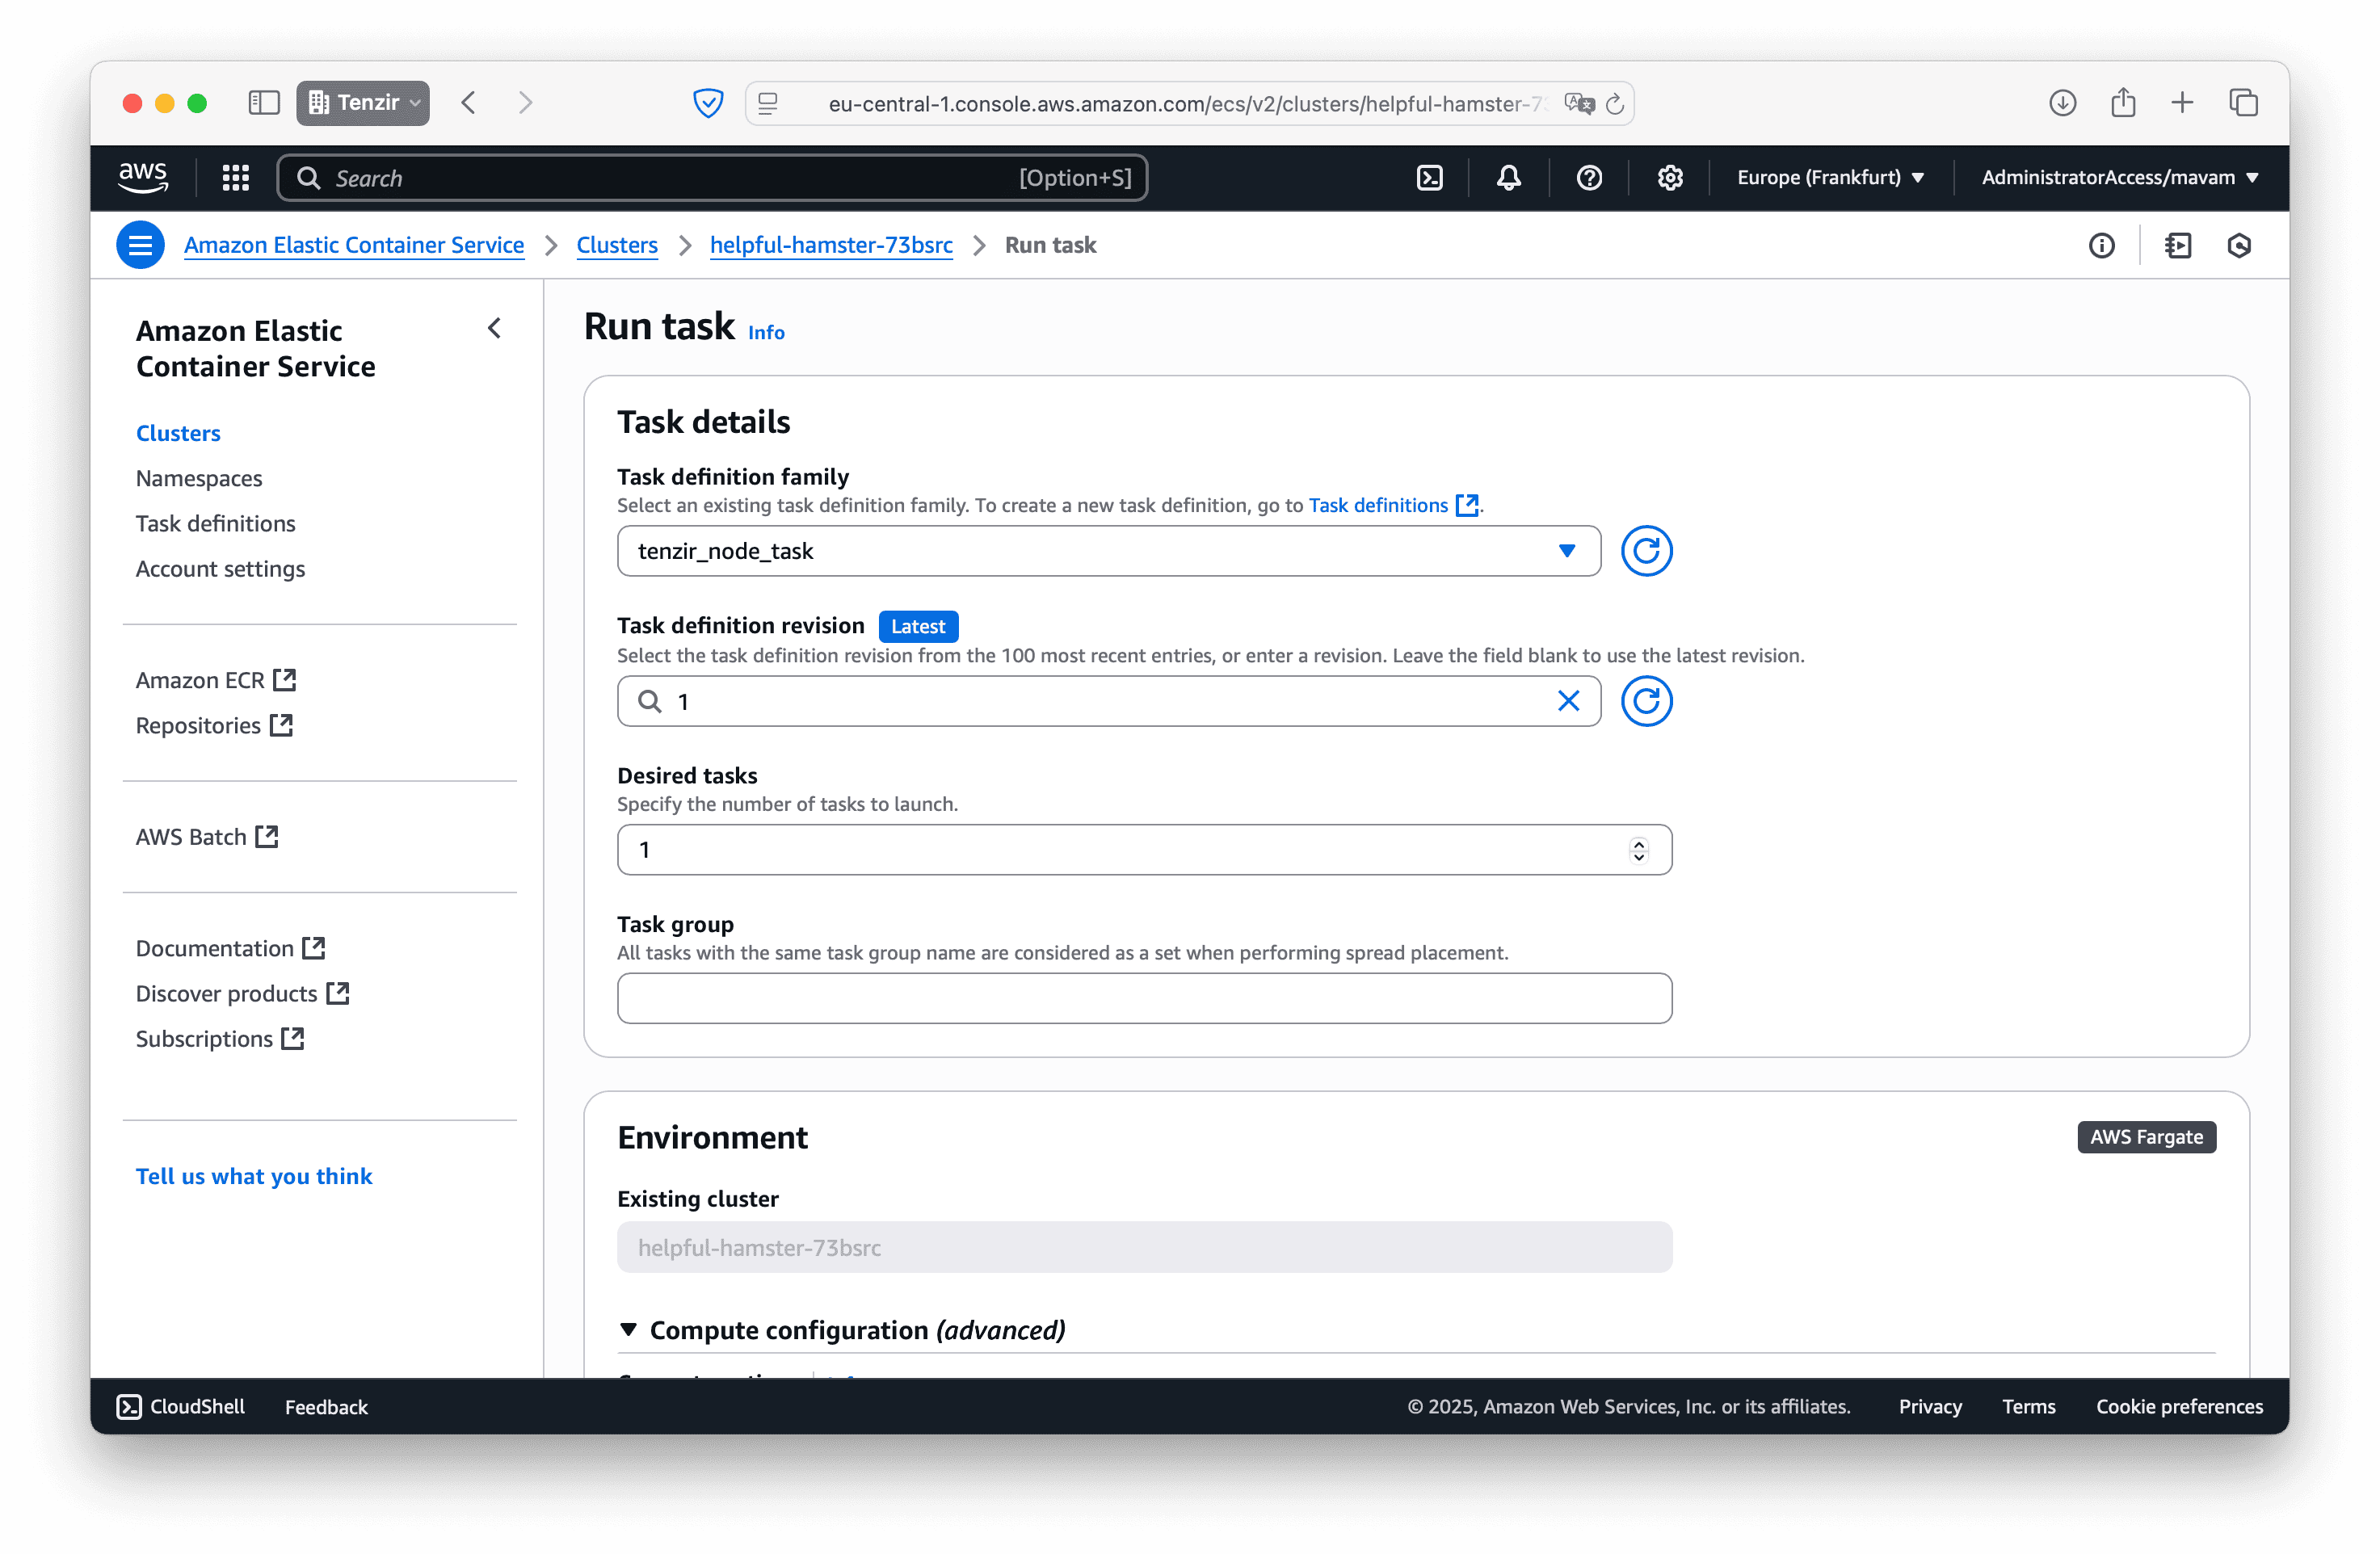
In the Container overrides section, add the
TENZIR_TOKENenvironment variable with the token value corresponding to your node.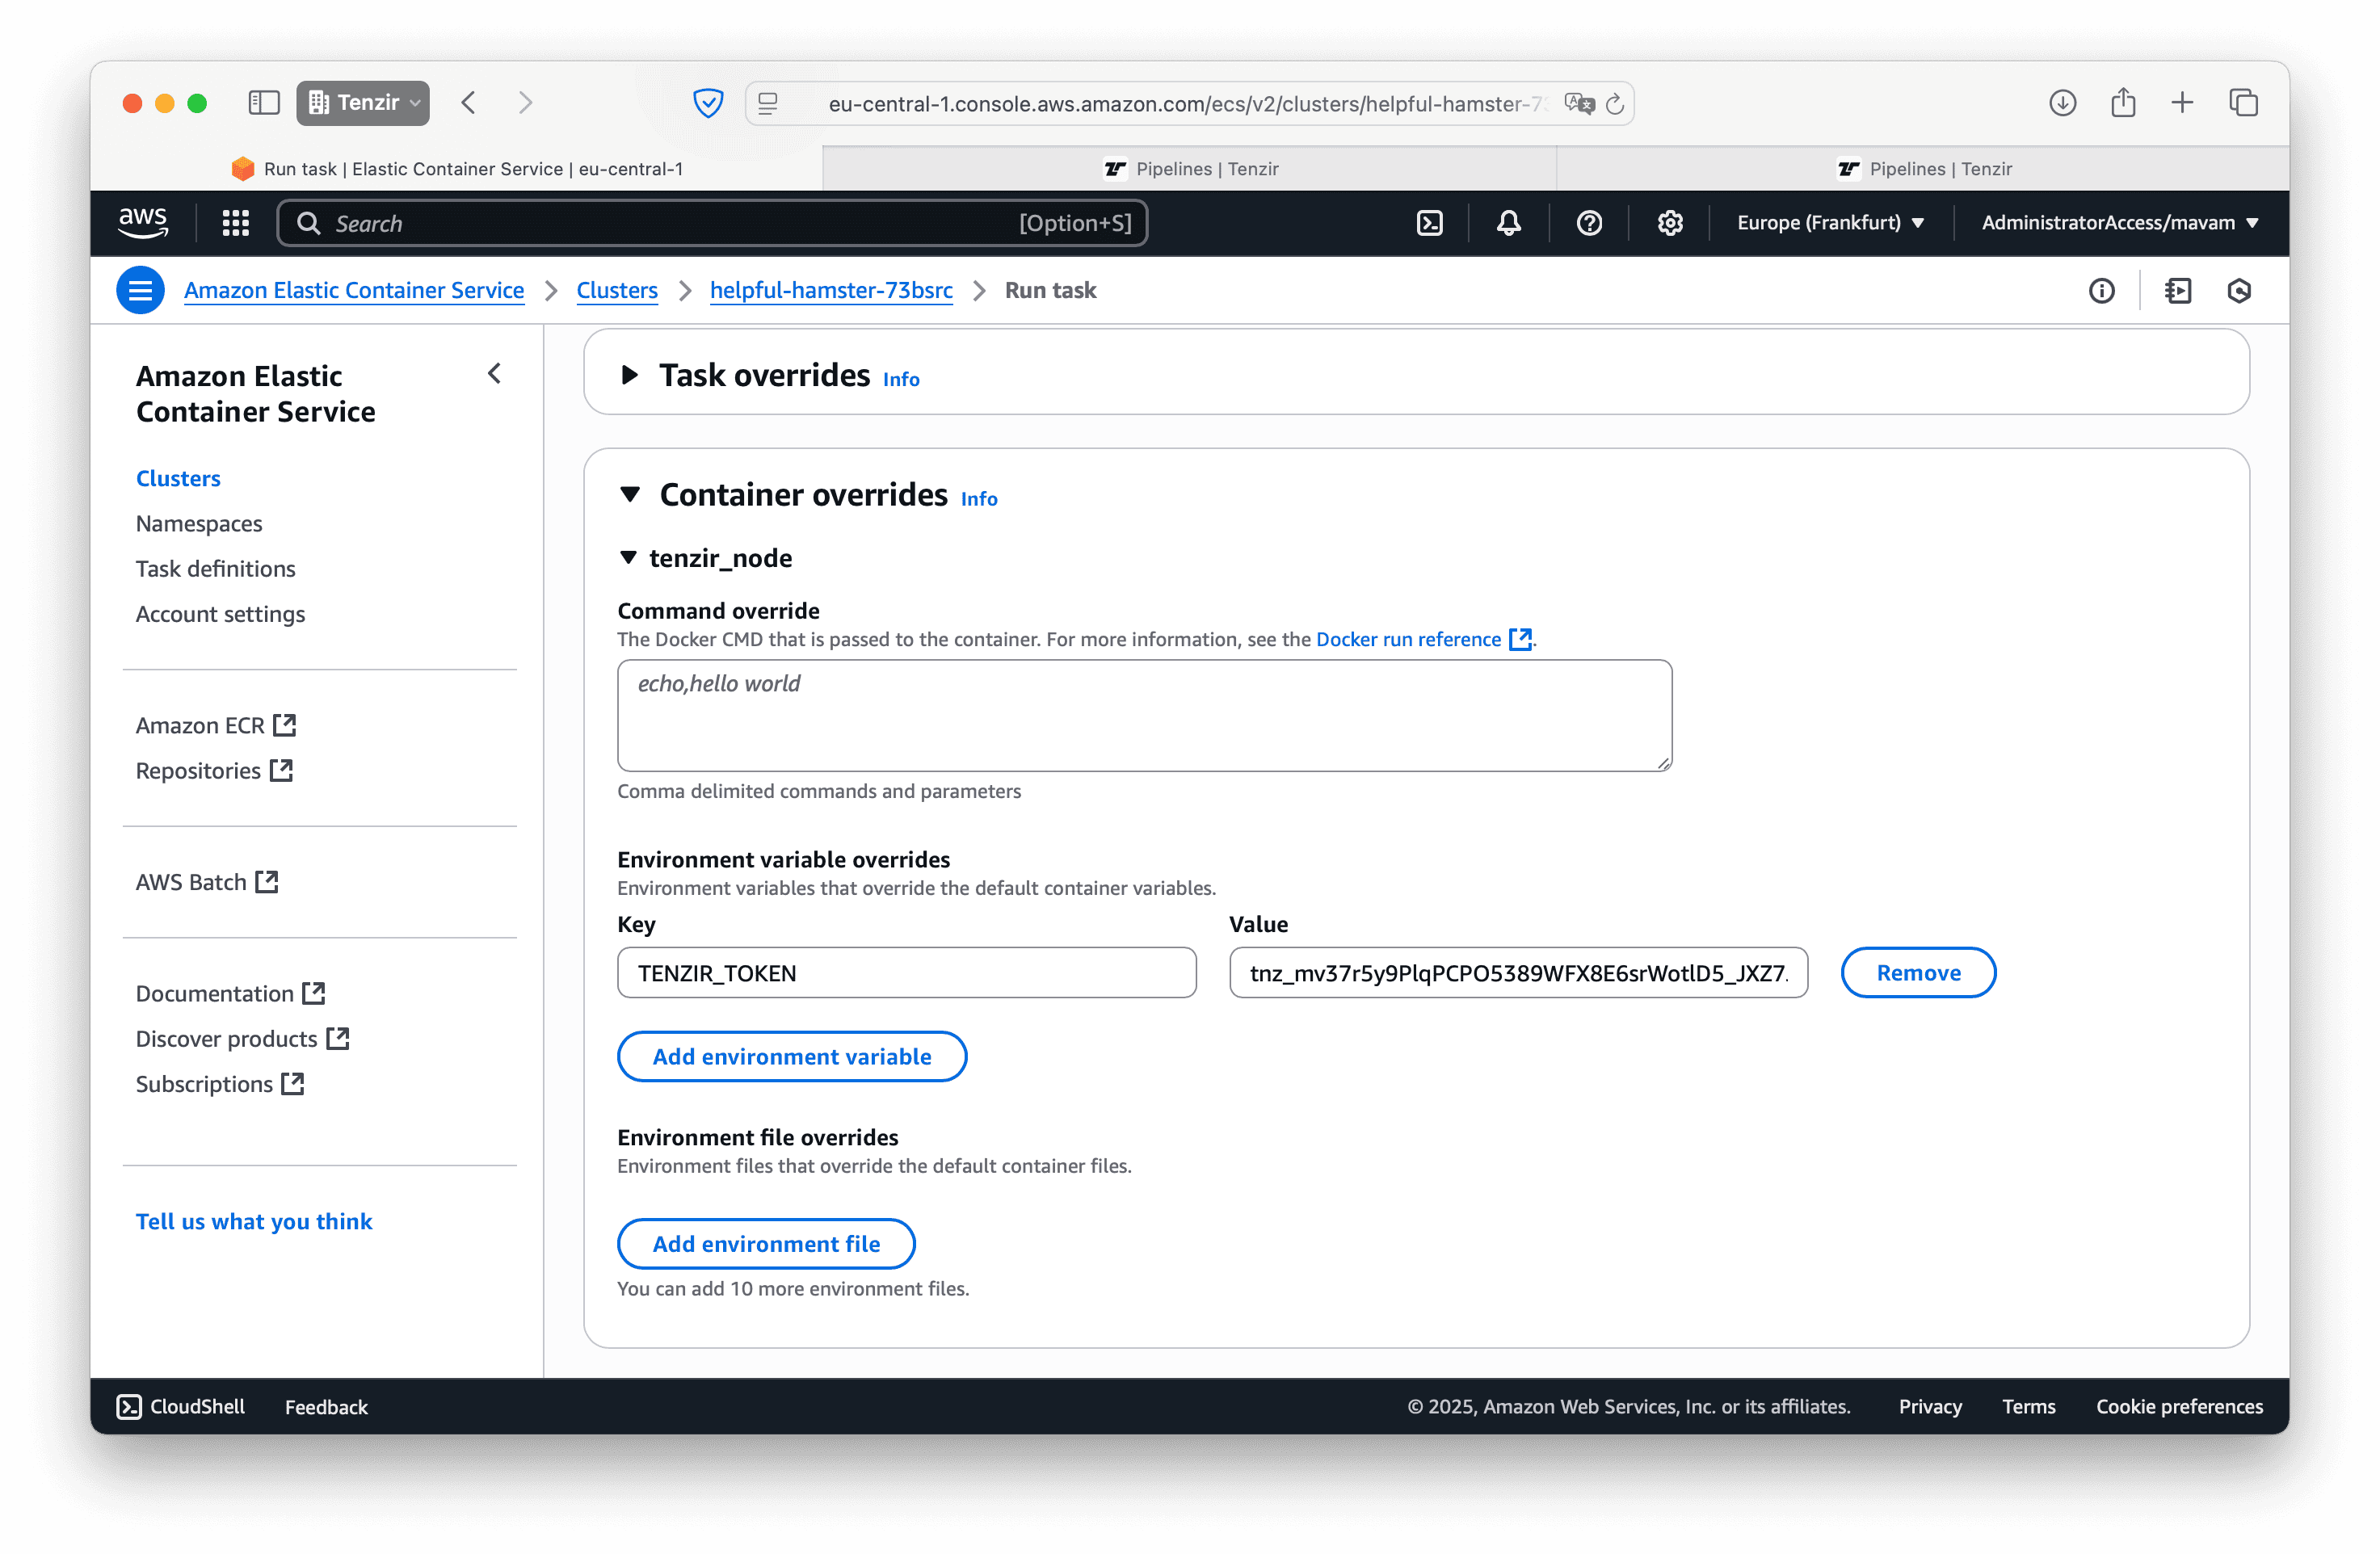
Click Create to launch your node.
-
Once the container starts successfully, your node will automatically connect to your workspace.
To run a node in Azure, we recommend using Azure Container Instances (ACI), which allows you to run Docker containers without having to setup VMs.
Azure Container Instances (ACI)
Section titled “Azure Container Instances (ACI)”The following steps guide you through deploying a Tenzir Node using ACI.
Create a new container instance
Section titled “Create a new container instance”- Open portal.azure.com.
- Navigate to the Container instances.
- Click the Create button.
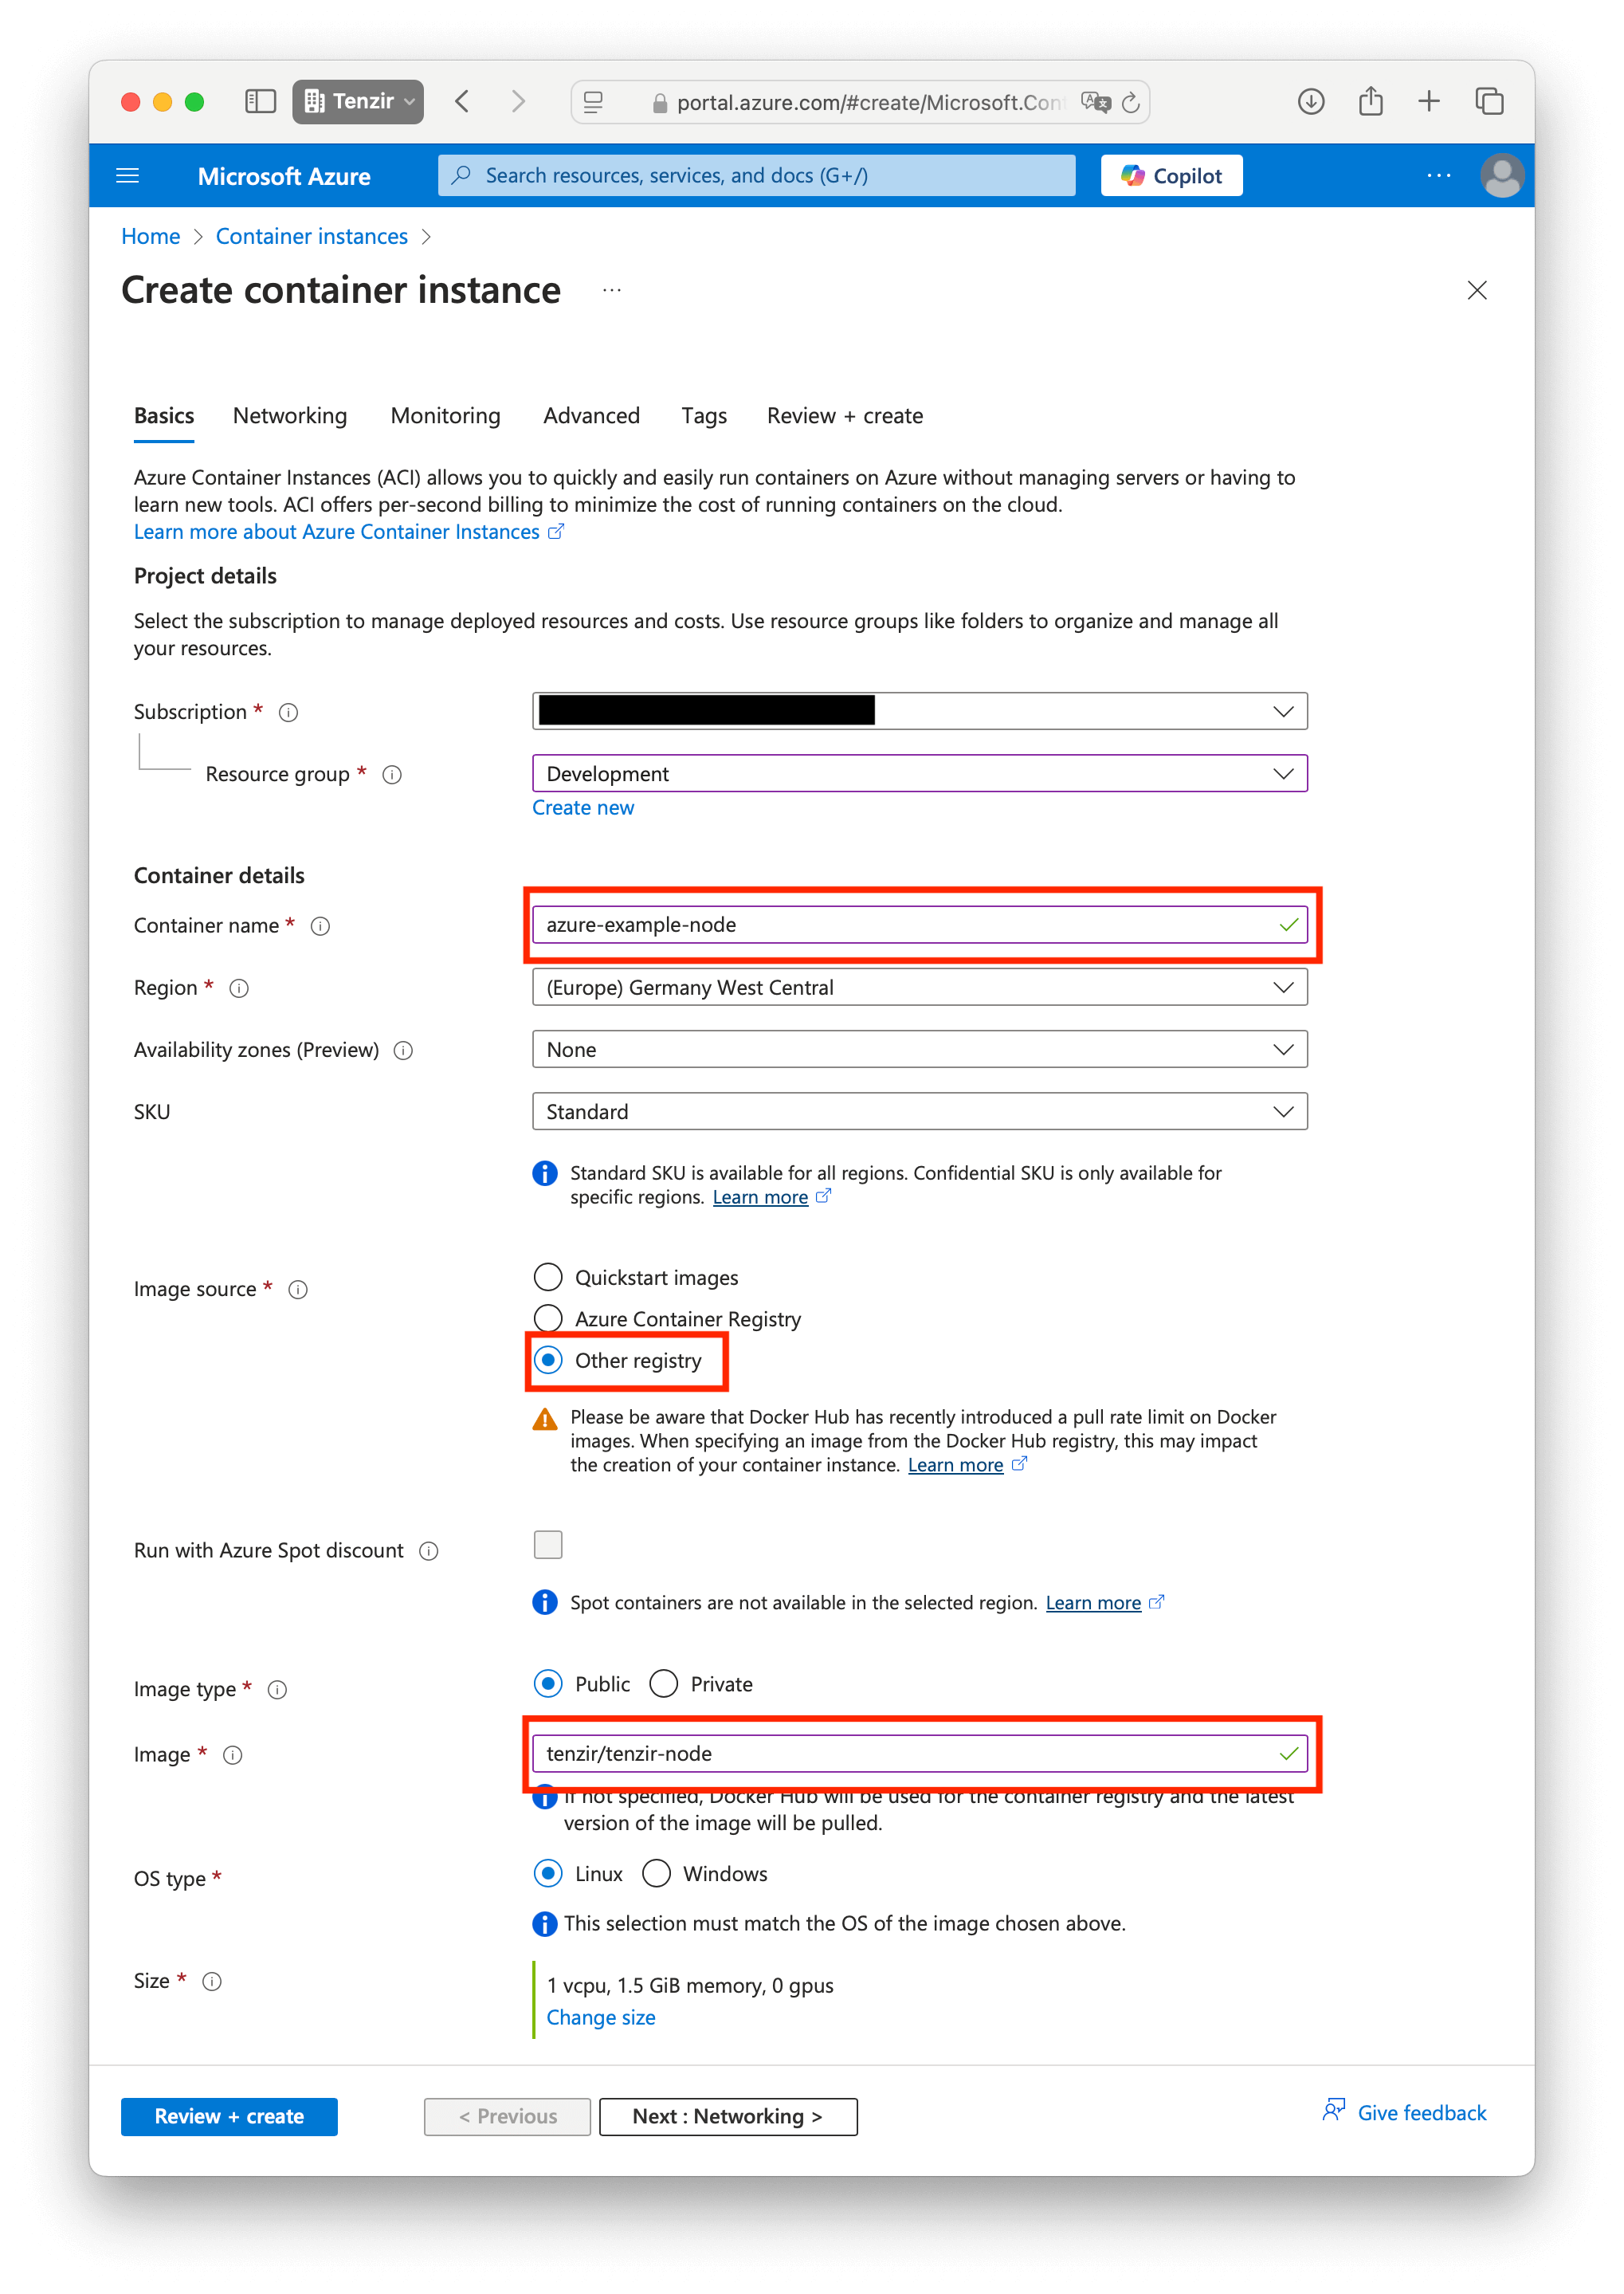
Basics
Section titled “Basics”In the Basics tab, perform the following action:
- Choose a container name.
- For Image source, select Other registry.
- For Image, enter
tenzir/tenzir-node.
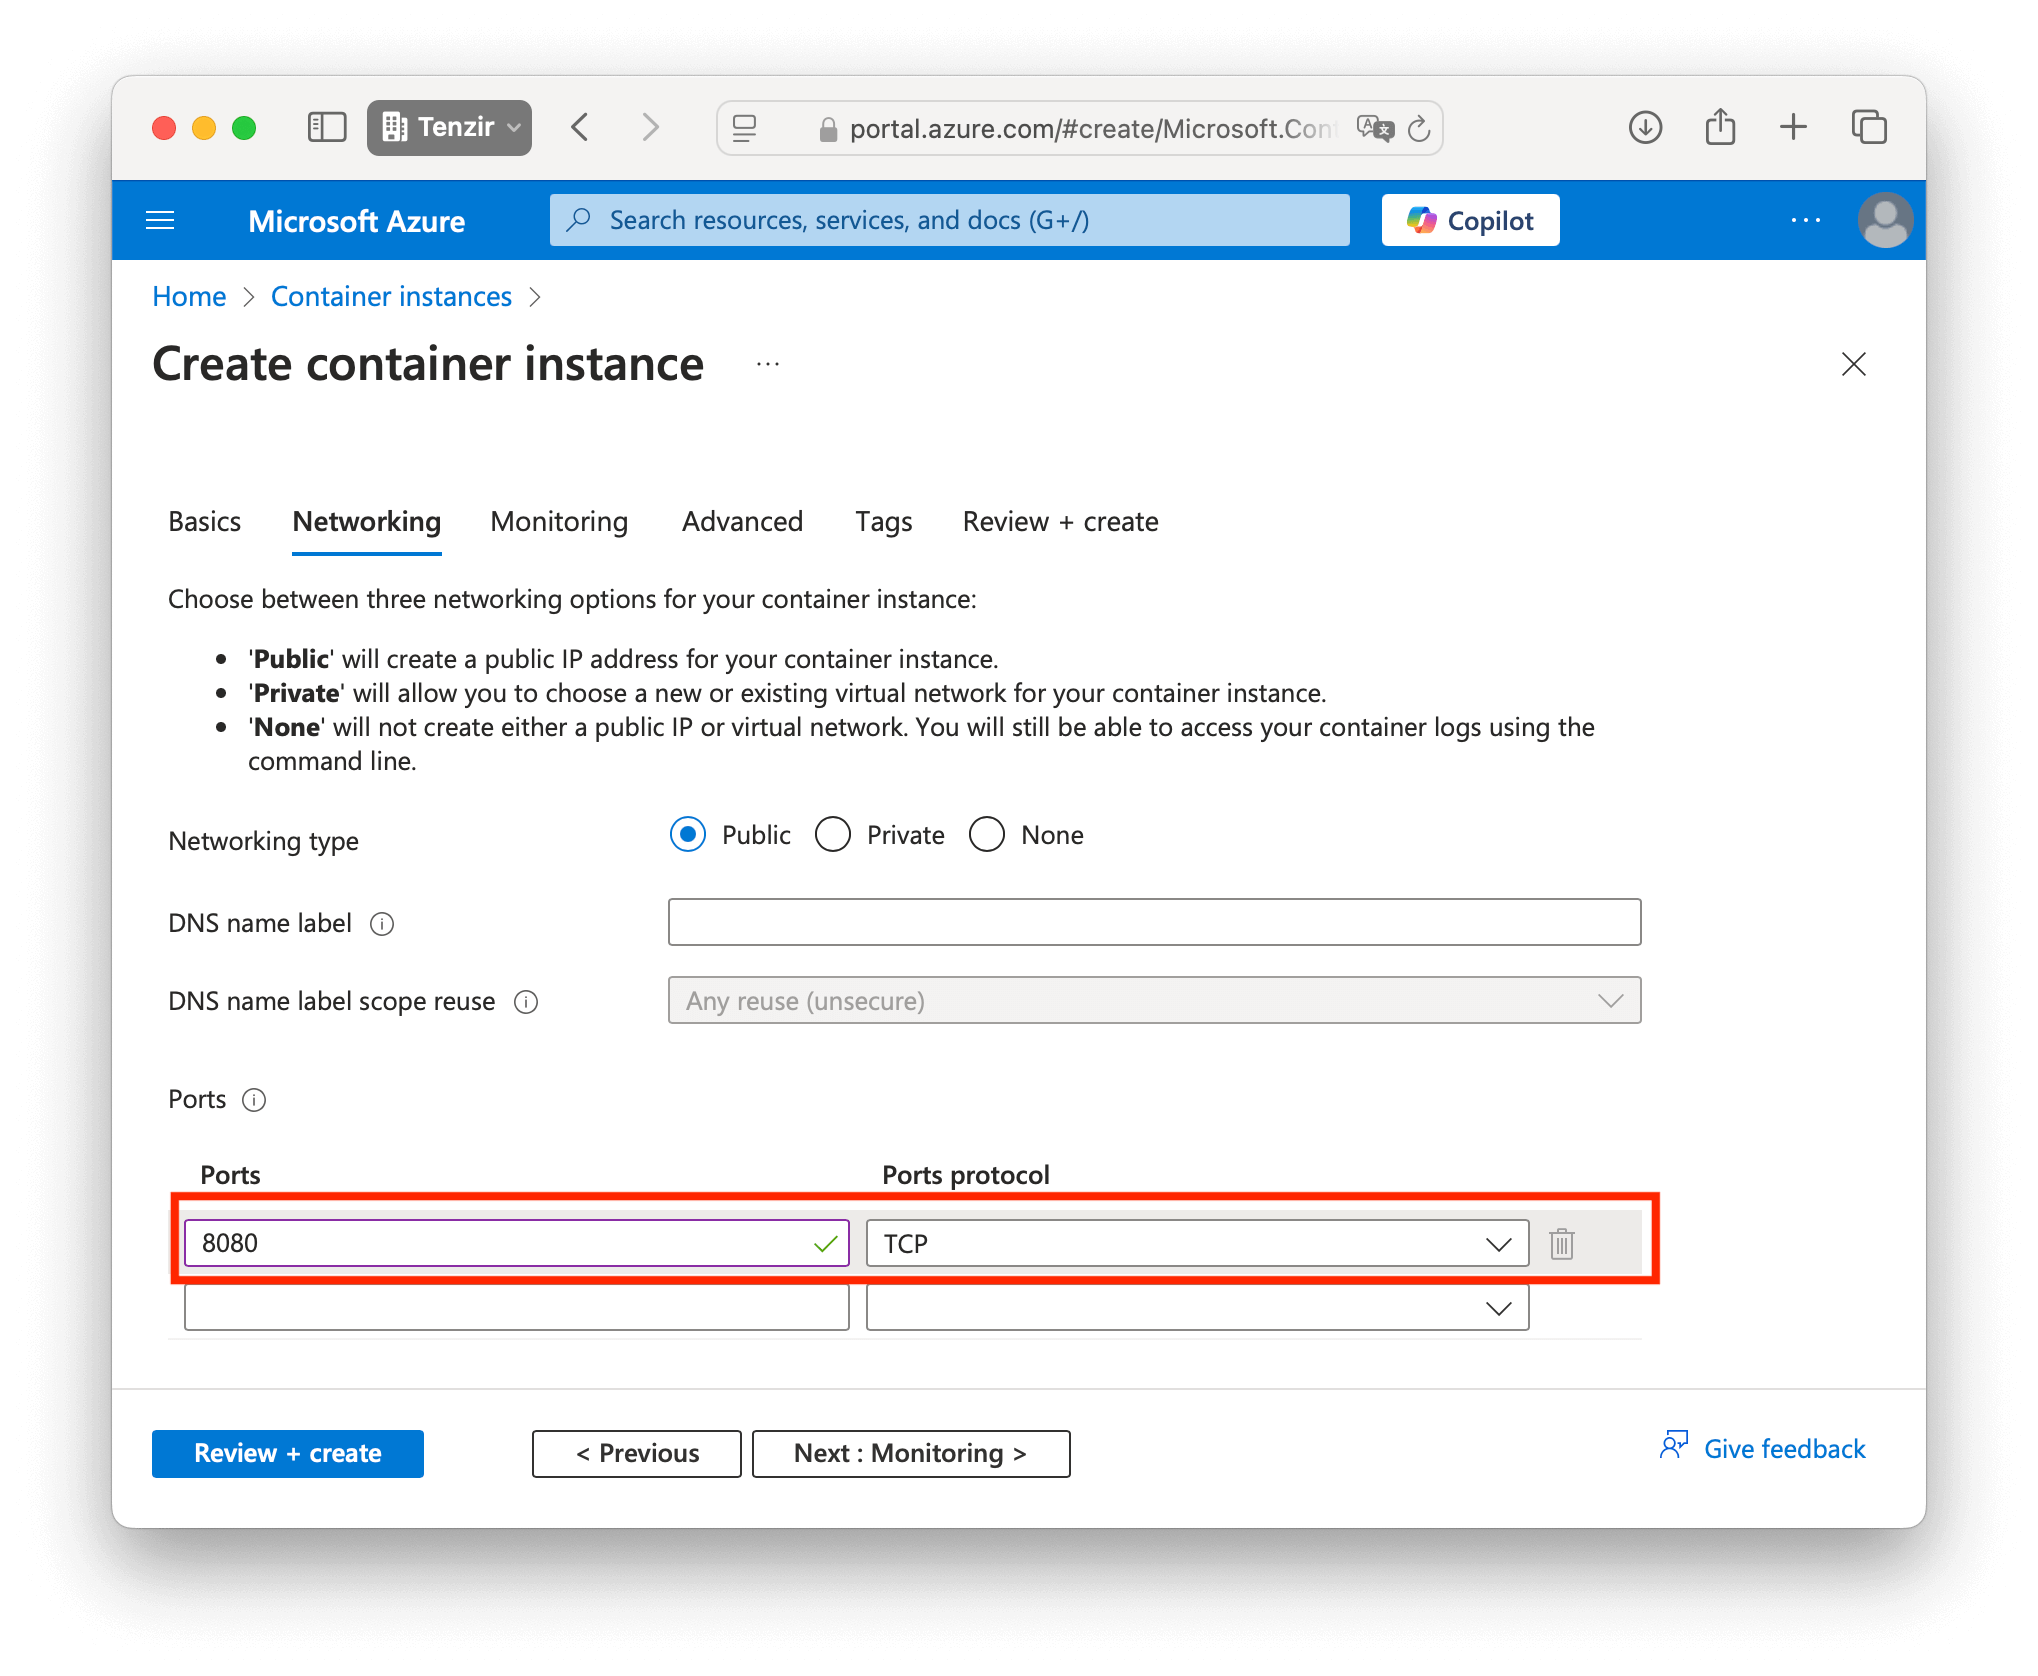
Networking
Section titled “Networking”In the Networking tab, configure the ports you plan to use for pipelines that receive incoming connections.
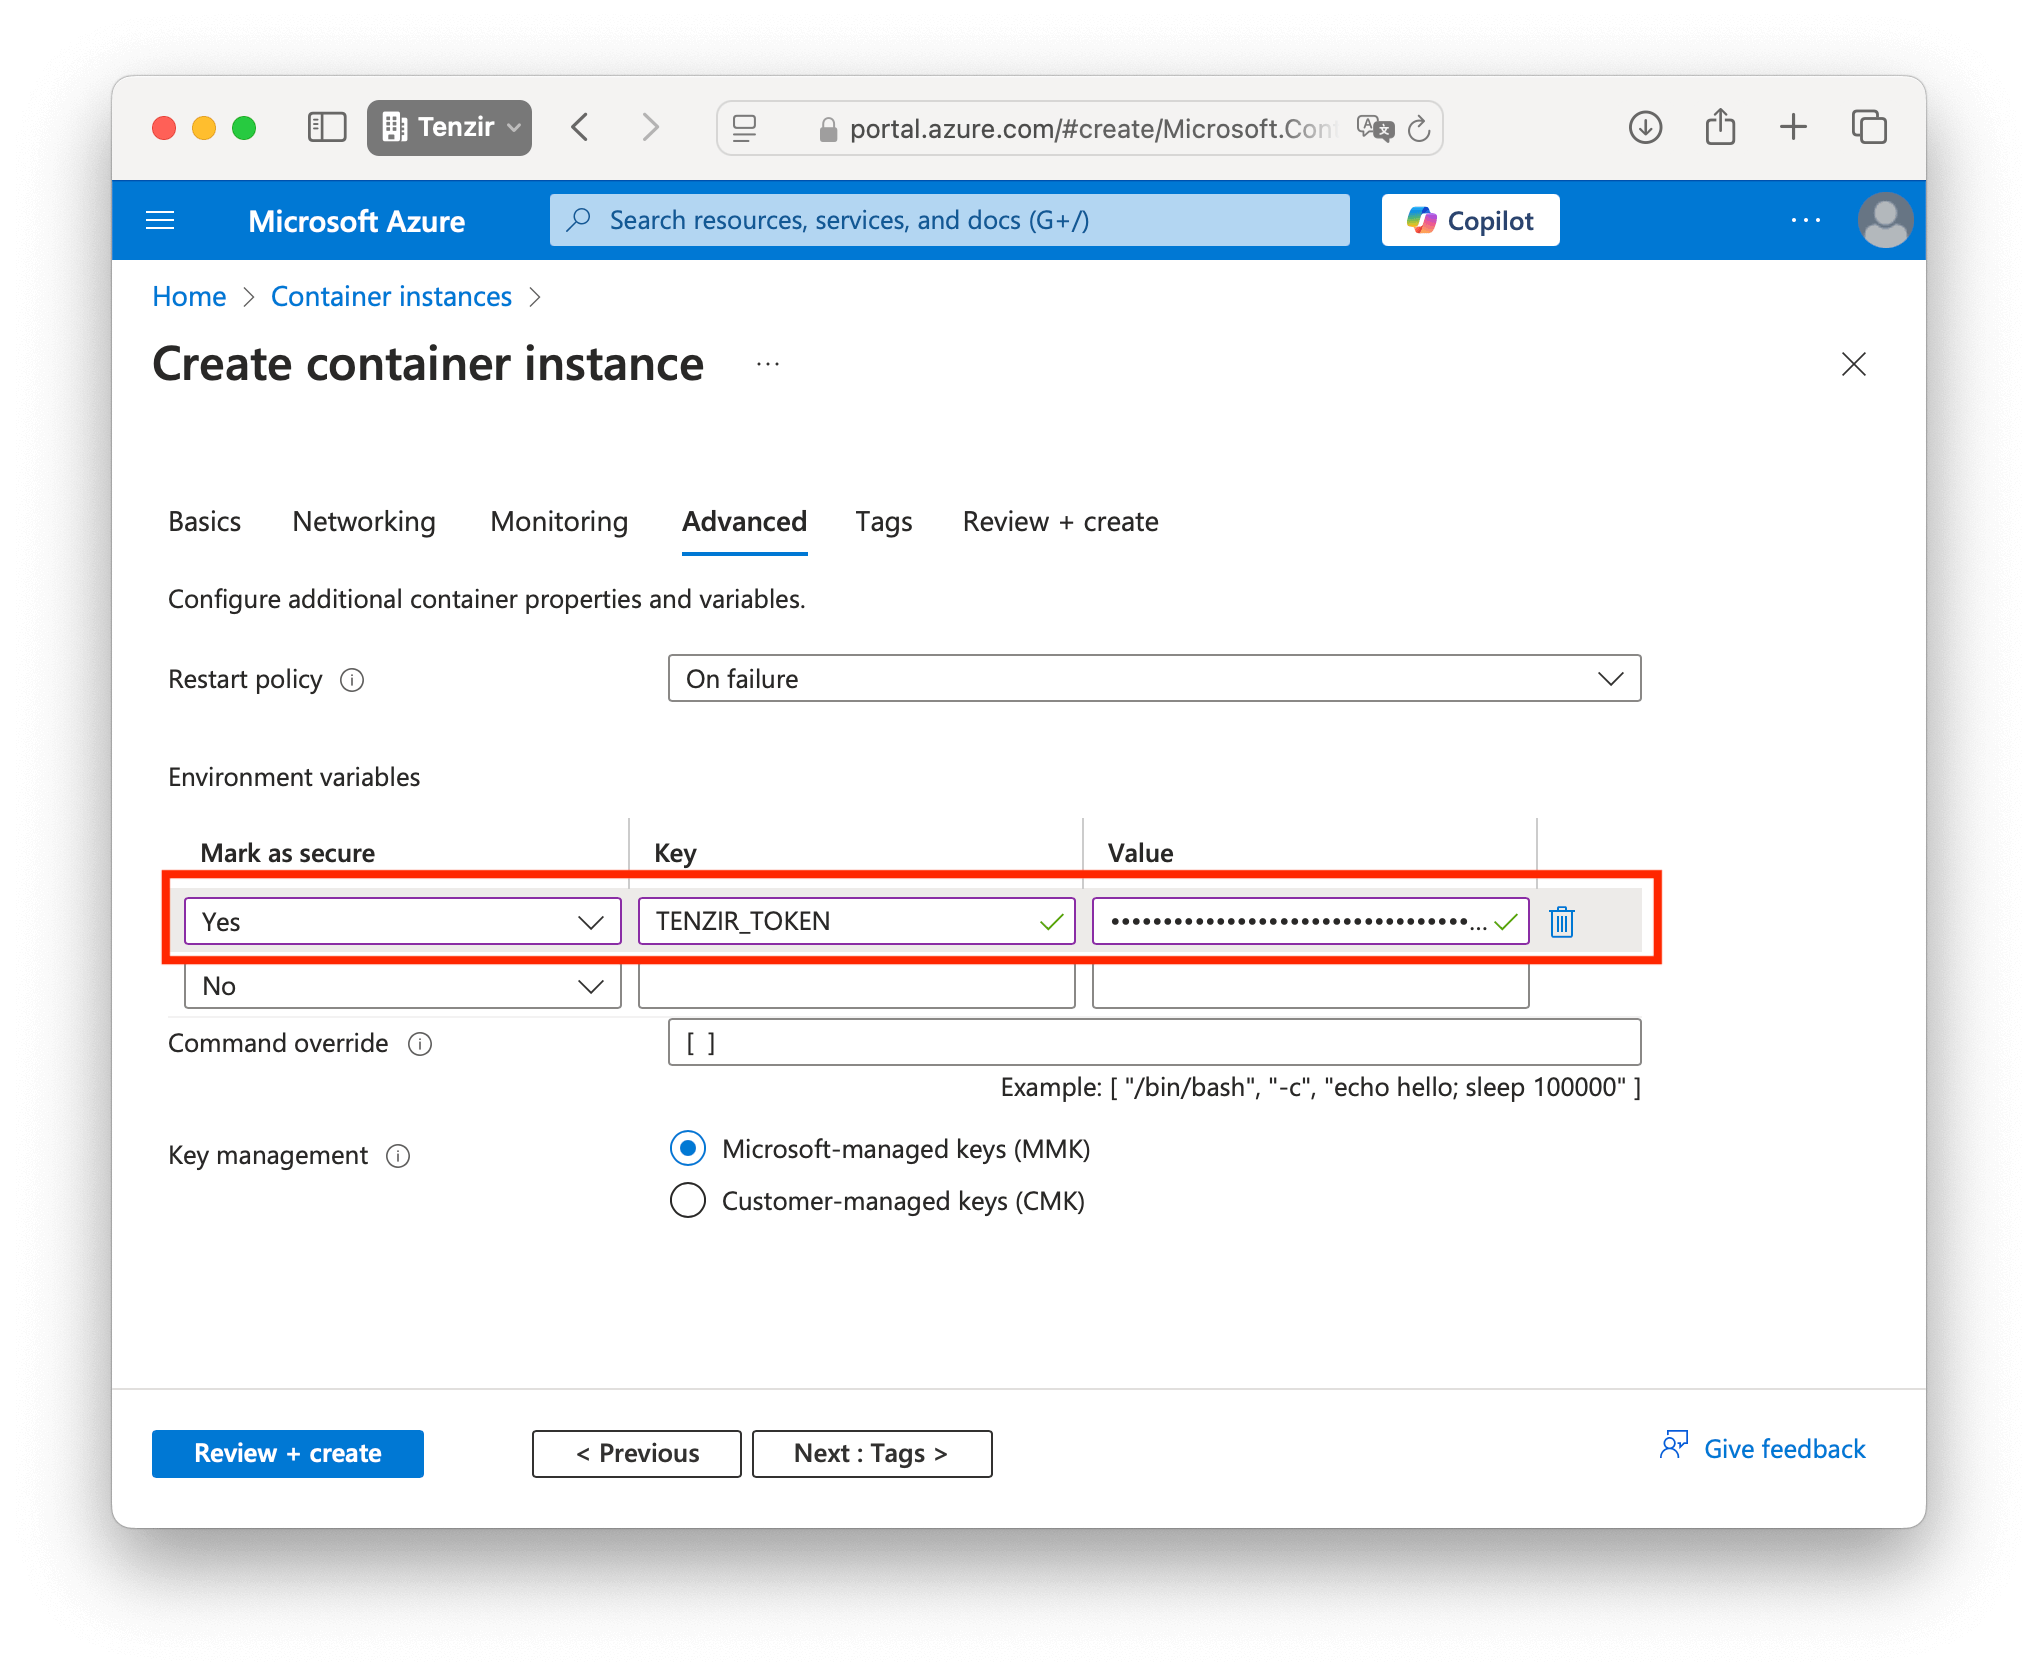
Advanced
Section titled “Advanced”In the Advanced tab, enter the TENZIR_TOKEN environment variable from your
Docker Compose file.
Create
Section titled “Create”Once you’ve completed the configuration, click the Create button. Your node is now up and running.
Looking for a native macOS package? We’re not quite there yet—but you can still run Tenzir smoothly on macOS using Docker.
Want to see a native macOS build? Let us know! Drop your vote in our Discord community—we prioritize what our users need most.
Tenzir does run well on macOS under the hood. Docker just bridges the gap for now.
Ansible
Section titled “Ansible”The Ansible role for Tenzir allows for easy integration of Tenzir into
existing Ansible setups. The role uses either the Tenzir Debian package or
the tarball installation method depending on which is appropriate for the
target environment. The role definition is in the
ansible/roles/tenzir directory of the Tenzir
repository. You need a local copy of this directory so you can use it in your
playbook.
Example
Section titled “Example”This example playbook shows how to run a Tenzir service on the machine
example_tenzir_server:
- name: Deploy Tenzir become: true hosts: example_tenzir_server remote_user: example_ansible_user roles: - role: tenzir vars: tenzir_config_dir: ./tenzir tenzir_read_write_paths: [/tmp] tenzir_archive: ./tenzir.tar.gz tenzir_debian_package: ./tenzir.debVariables
Section titled “Variables”tenzir_config_dir (required)
Section titled “tenzir_config_dir (required)”A path to directory containing a tenzir.yaml
relative to the playbook.
tenzir_read_write_paths
Section titled “tenzir_read_write_paths”A list of paths that Tenzir shall be granted access to in addition to its own state and log directories.
tenzir_archive
Section titled “tenzir_archive”A tarball of Tenzir structured like those that can be downloaded from the
GitHub Releases Page. This is used
for target distributions that are not based on the apt package manager.
tenzir_debian_package
Section titled “tenzir_debian_package”A Debian package (.deb). This package is used for Debian and Debian-based
Linux distributions.